
Julien Chiari tell us his experience using Pulldownit and Phoenix plugins in 3dMax for his destruction tests inspired by Minas Tirith. It is a good idea to make some tests before going to something bigger and with Pulldownit you can do your previz destruction fast and easy as Julien explains below.
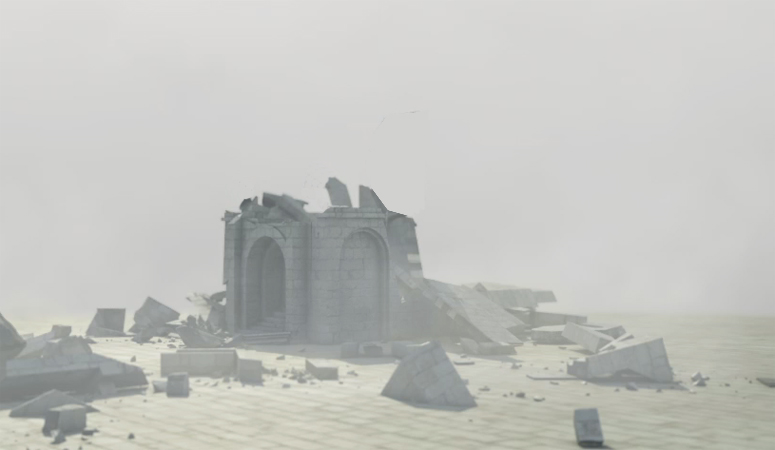
When seeing “The Return of the King” by the great Peter Jackson, the destruction scenes of Minas Tirith environment impressed me a lot, so a little later I decided to create a destruction scene in the same spirit, and at the same time testing Pulldownit plugin in 3d Max which looked like the perfect tool to do it.
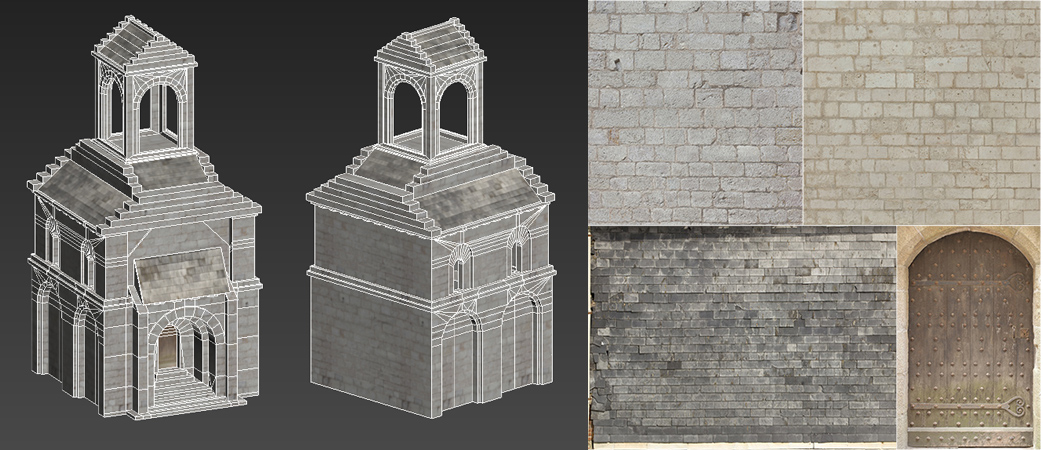
Modelling & Texturing
Using screen captures of the movie as references, for creating the building I started from a box primitive converting it to a polyobject and building the shape step by step using poly modifiers; given that the model was going to break, I was especially careful with topology, not open edges and such, and also keep poly count low for faster computations, at the end the model was about 2500 faces, I created shaders and VRay materials from HD textures found on the site cgtextures.com, great site to find textures by the way.
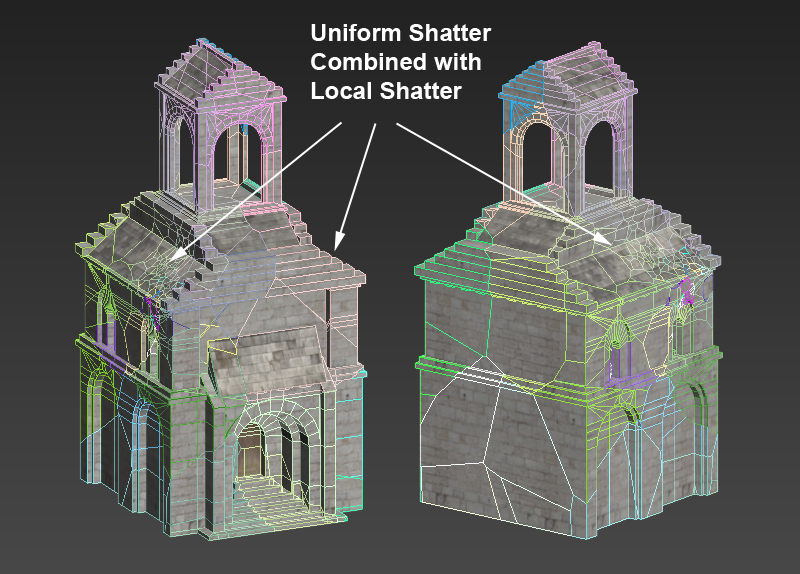
Shattering the geometry
I started applying an uniform shatter to the whole building, PDI did it perfectly at once, even the tower and the complex geometry in the main door were shattered correctly and almost instant, pretty impressing. After that I added more fragments in the area of impact with the impact stone using local shatter, after a few seconds PDi had generated about 560 nice fragments from the original solid model.
Just after that I added PDI Jagginess to the fragments with a resolution of 2 to keep the poly count as low as possible but still increasing the realism of the fragments, this is one of my favorites features of PDI.
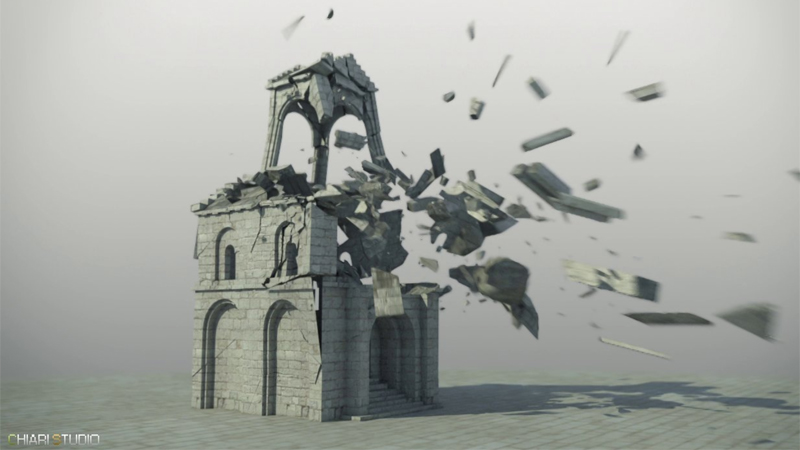
Computing Dynamics
I created a PDI dynamic body for the impact stone, to make It move fast I simply added a large initial velocity and spin in PDi dynamics properties. Besides I created a fracture body for the whole building. I set quality medium for the tests as it was still pretty fast computing, using a core i7 with 16GB RAM, it took about 4 min to compute 250 frames of simulation, this nice speed allowed me to perform several tests with different parameters until achieving the desired look with ease.
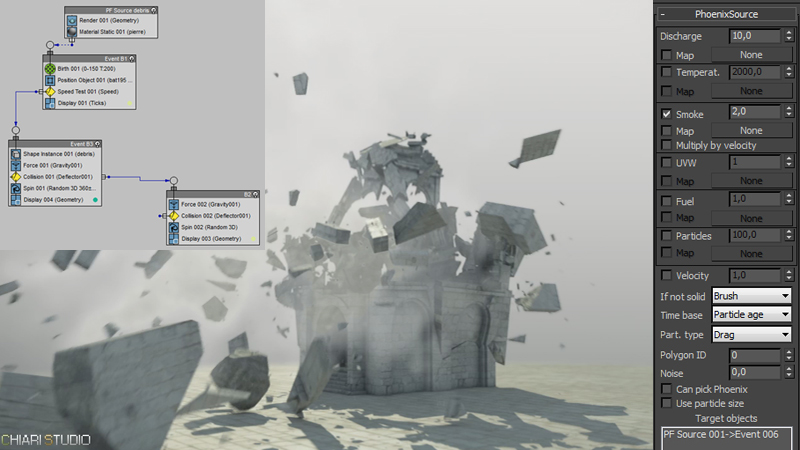
Adding smoke
In order to add smoke to the destruction scene I have used the plugin PhoenixFD. For doing it I used a Pflow chart to emit particles from the fragments only when they reach a certain speed, for getting this the event 6 of the PF source was used as target for a PHXSource node.
Conclusions
In my experience Pulldownit is a powerful and easy to use plugin and very stable. The set of parameters allows getting fine control over the simulation, moreover it is fast computing. I will continue using it in my projects as after the tests, I have been definitively seduced by its stability, speed, simplicity and the quality of dynamics I`ve got.
About the author
Hi everyone my name is Julien Chiari, Im a 3D generalist currently living in south of France. I have got my degree at SupInfoCom Valenciennes, after that I have been working in videogames like Vrally, Roland Garros 98 or Test Drive Unlimited, since year 2000 I work as freelance in different projects. My web sites:
