
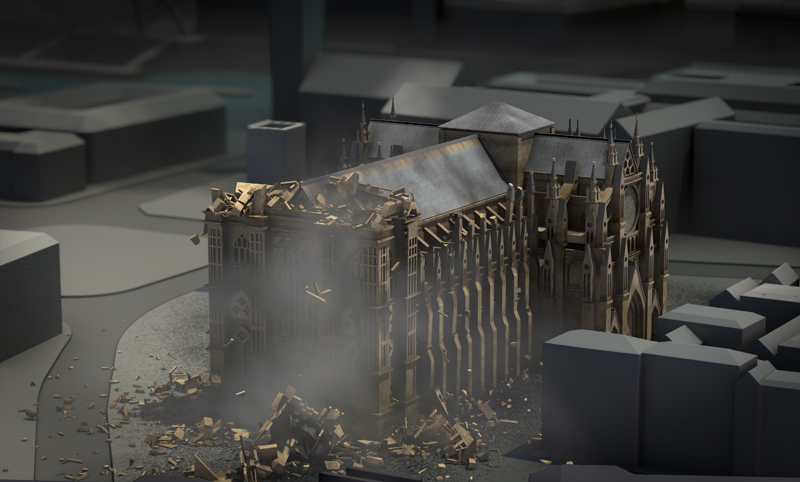
At Thinkinetic we enjoy to destroy ancient buildings digitally  , this time was the turn of Westminster Abbey in the heart of London, destruction was integrally done in Maya using Pulldownit plugin and Maya fluids, in this review the team explain how we made it.
Shatter & Destruction
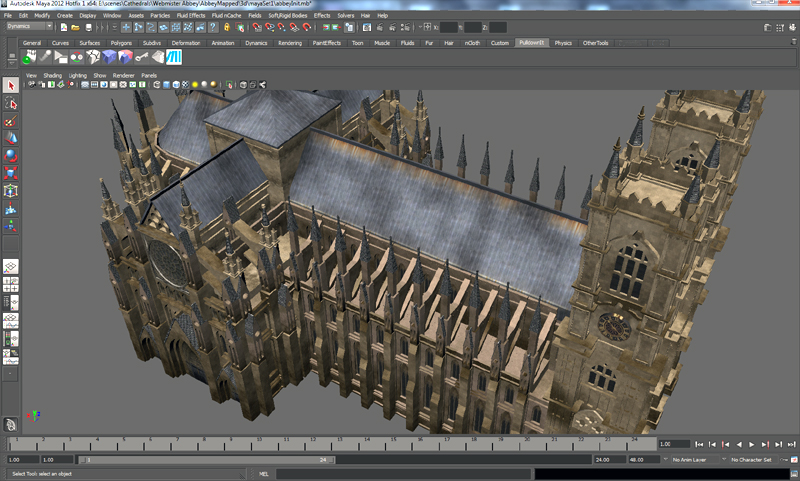
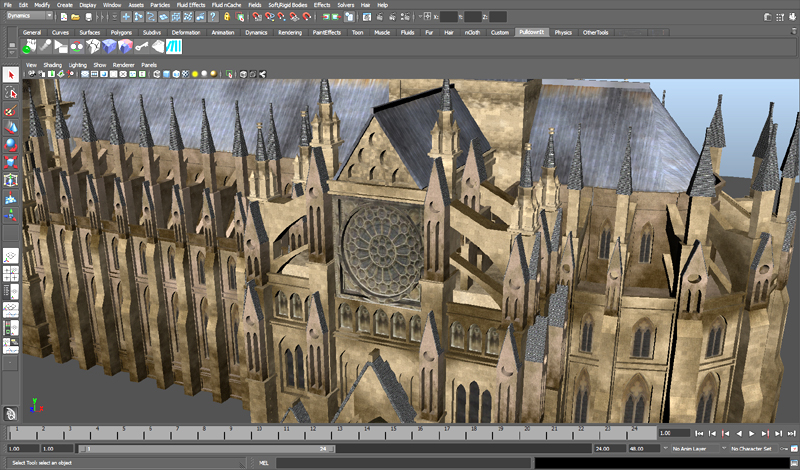
Our Abbey model was about 57000 faces, not too much really, but it wasn’t a single mesh rather was made of about 1000 different objects; walls, columns, beams, turrets, windows, hallways, roofs, buttresses,.. everything was made of independent objects, the first thing I did was checking all objects and close those which were open to shatter them without artifacts. We wanted a large number of fragments for the abbey destruction, but keeping it below 5000 shards, because above this Maya viewport start to work much slower and also PDI dynamics takes longer to compute.
For creating the long crack over the front wall I used path-based style, drawing a spline over the surface and shattering the wall in about 1000 shards, most part of the fragments would belong to the towers though, so we set a count of 1500 shards each one, however the towers were made of many different objects, some of them were large as walls and columns and needed more fragments while many others as trimmings were very little and needed just a few cuts. I grouped all large objects in one layer to shatter them with about 32 fragments per object the selecting little ones to shatter them in about 4 fragments each one, after that there were still some large pieces, I reshattered them taking care of not surpassing the 1500 shards count per tower, I used uniform style for all cuts. Finally I shatter the battlements row on the right side using uniform style with about 500 shards for all of them.
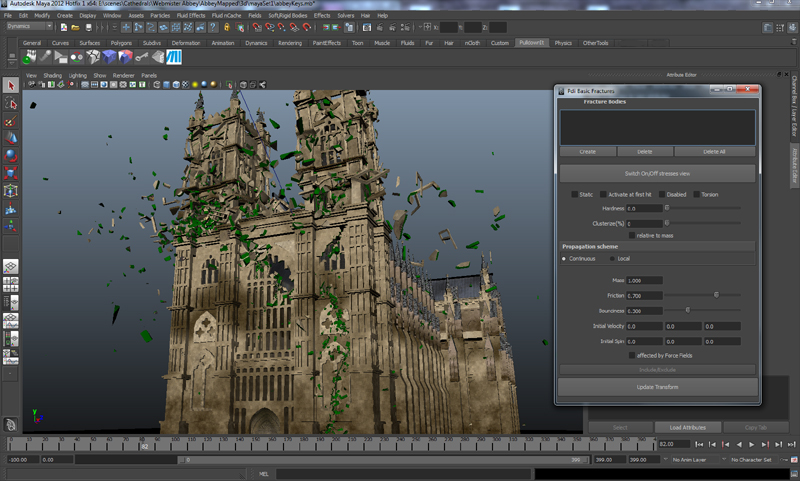
Destruction work was huge in this set so schedulled in three stages, the wall crack, towers destruction and battlements row collapsing. In order to save computation time, wall crack was computed first alone, then baking keys and removing all pdi data to start with a clean scene for the towers destruction, I set everything to convex hull and activate at first hit also create some clusters of fragments using fracture bodies, I placed a volume axis field for each tower near the clocks, animating magnitude to make the towers explode at different frames. In order to save performance I wrapped the abbey with some boxes set as static to make the fragments collide with it in place of using the original geometry, PDI took around 25 min to compute dynamics for near 3000 fragments, quite impressive. After the destruction was done, I bake keys and remove pdi data again before starting with the battlements collapse. I started shattering the whole row of turrets with uniform style, then creating a fracture body for all fragments adn using Pdi advanced fractures to make the turrets collapsing sequentially at diferent frames, I tweaked break energy several times until getting the desired look.
Maya Fluids Setup
My goal was to simulate dust and smoke using Maya fluids, and integrate it with the destruction previously done using Pulldownit plugin, first I had to decide from which fragments to emit, also I created some additional objects , making them invisible, to emit from. Once the emitters was set, I made a sketch of the moments when the objects would start to emit, finally I divided the task into 3 phases, the main wall crack, towers exploding and towers collapsing.
I modeled and object following the shape of the wall crack and split it in two to create an emitter at the first frame an another one some frames later, I chose to emit from surface and set keys for buoyancy and particle rate in the emitter so It emits for some frames and then progressively disappears. Additionally I combined some of the flying fragments to emit from them as well, in this way I had to create only one emitter for all of them at once.
Finally I set the ground and some parts of the structure as passive so the dust will collidewith them, leaving some parts unassigned so the dust could pass through it.
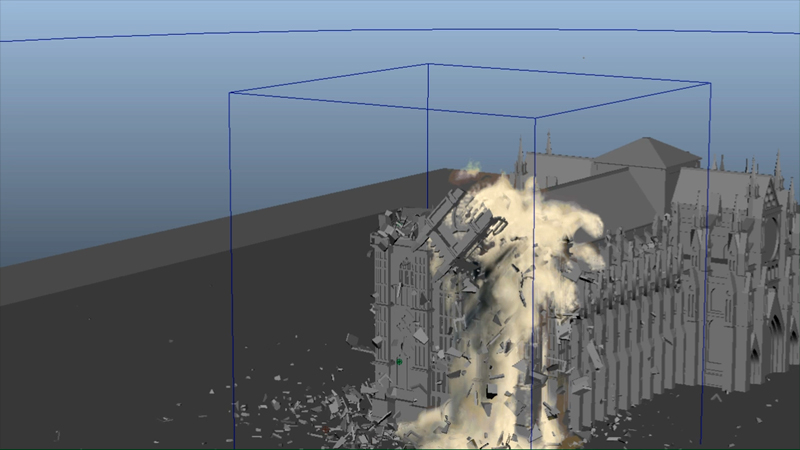
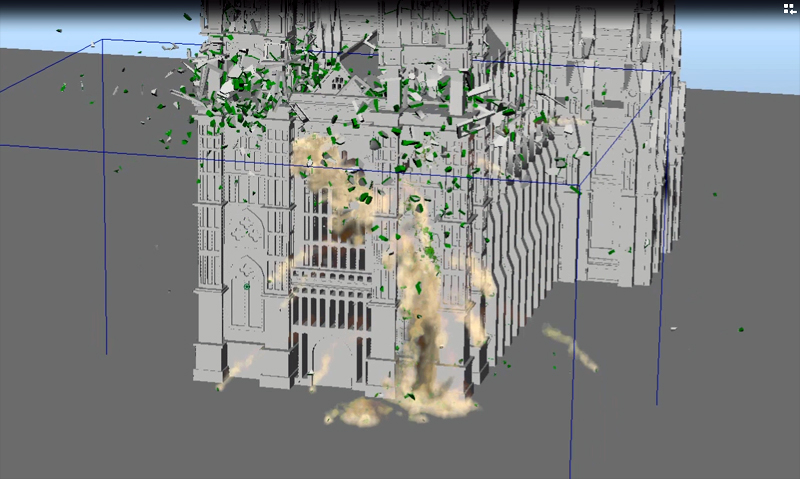
For the towers explosion I combined some of the flying fragments in a single object to emit from them, I did the same for several clusters of fragments of both towers, I had to set a high resolution for the containers, between 120 and 250 cells, because otherwise the smaller fragments would emit intermittently, I wanted the fluids to look like dust, the main difference between dust and smoke is dust tends to drop while smoke tends to rise, so I tweaked bouyancy and density of the emitter to get dropping wakes of fluids, finally I set keys for emission at different frames for both towers as I wanted them to explode with a delay.
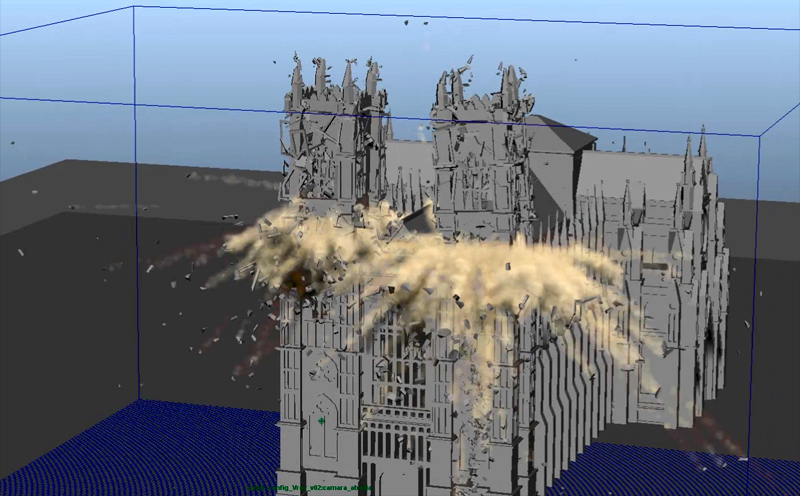
The last stage was the collapse of towers, it was more difficult to be done, fragments didn’t fly away neither were falling smoothly, instead they were dropping a bit then stopping then dropping completely, I had to key the bouyancy, density and turbulence of the fluids so it started lighter and smoothly and when the tower fall completely I increased density and turbulence to speed up its motion and make it look more chaotic.
The original model was too complex for using it for collisions with fluids, so I modeled a proxy-object with the overall shape of the abbey, setting it to passive for making fluids collide;. I created again one container per tower in order to control fluids independently for each one, those containers were of high resolution as they had a long path towards the ground, and extending quite a lot later over it. To create the feeling of the dust coming through the walls I emitted from inner fragments only.
Maya Fluids Render
Before going into render I cached all fluids to can distribute later the task in several computers. I order to integrate fluids passes with the rest, I created 3 render layers, one with the fluid alone, another with the fluid and fragments in alpha channel, and the last one with the shadow of the fluid projected over the ground. I used Maya software for the render layers and Mental ray for the shadow pass, per frame render time was quite long due to the high resolution of fluids. I used a ramp from white to dark beige for fluid density, and a couple of maps in texture and opacity; there was only a directional light in scene so to prevent from the fluid looking too dark in hidden areas I added a fake lighting for it using ambient light parameters.
Shading & Texturing
The model counts with 10 different textures made from pictures of the real building, taking parts of walls and windows pictures first thing I did was making seamless textures from them, after that dirt and wet traces were added for getting the look more realistic and gloomy,
We haven’t real pictures of the roof on a top view, so I decided to apply it a texture made from 4 different bitmaps of rusty and wet metal, I composed all of them in a single image adapted to the geometry of the model.
Although the environment around the abbey is only sketched, we wanted the ground to appear like burned and wasted so I made a noise mask for the ground composing different kind of stones and adding dust and burn filters.
The textures were applied using an unwrap modifier for the ground, roof and main walls, using a 6-sides mapping for the rest of the objects, always having in account the seam with nearby textures, really a surgeon work.
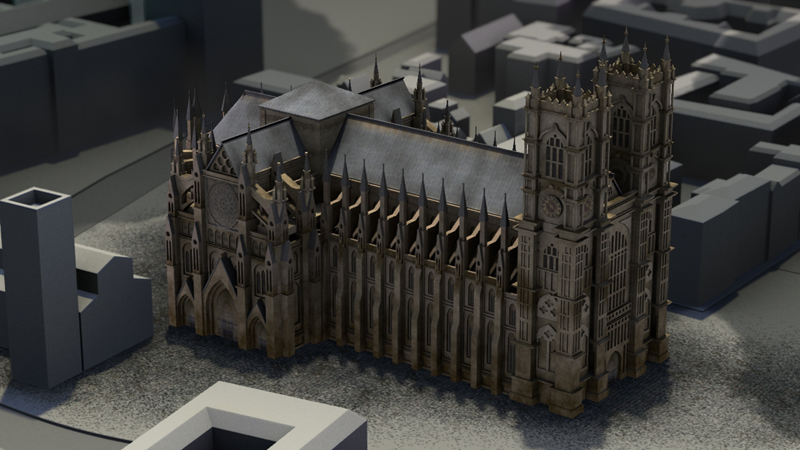
The abbey is featured in a realistic way while the environment is just conceptual, in this way the church clearly stands out from the rest, there are 17 lights in the scene, direct light is projecting a skewed shadow affecting buildings smoothly, ambient light affects everything though, a few lights are placed inside buildings around and behind the abbey to highlight the main model.
Render & Composition
Rendering was distributed in 32 passes, environment and Abbey in different layers always, we needed another layer with 3 passes for gathering the reflective light of the Thames River behind. Shadows were rendered in two steps with AO and direct channels mixed to give some weight to the scene, there are some mist passes and finally Zdepth were balanced in composition to get more depth of the scene view.
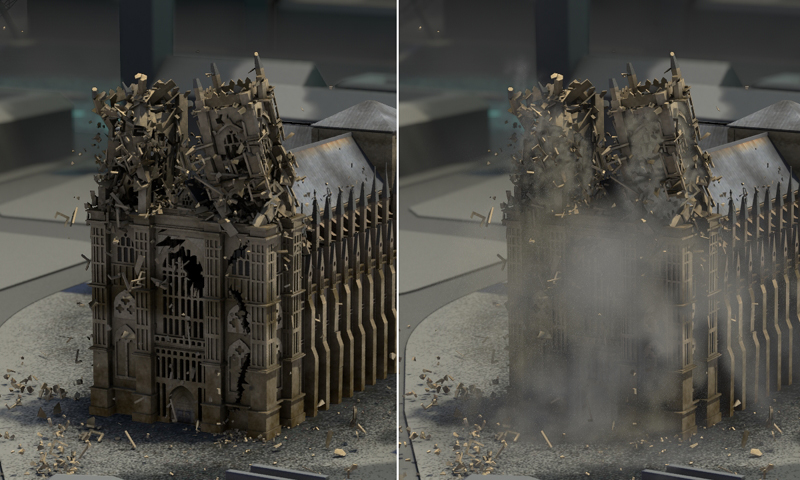
it took 5 days to render 32 passes of 500 frames each one, in a few computers using png format. Postpro was done using color correctors and RGB masks, using 3 reference frames only for tweaking colors and shadows to enhance the abbey destruction, applying the result to all frames after that. Dust passes were composed balancing the alpha channel for cutting down the density and noise levels, making in this way the flying fragments more noticeable however we wanted to still keep the appealling look of dust clouds, for getting this effect I tweaked contrast level until getting the desired look between fragments and dust.
Credits:
Shatter & Destruction
Esteban Cuesta
https://vimeo.com/user1988932
Maya fluids setup & render
Roberto Martin
https://vimeo.com/user5582471
Lighting, Texturing, Shading & Composition
Pedro Ivan de Frias
http://www.pytonproducciones.com/
