
Ivan Khmel has done this appealing shot of building destruction using Pulldownit plugin in Maya, he kindly explains details about production in this article
In creating this effect I wanted to make it as Hyper-real as possible. Looking for a high resolution photo online of a abandoned brick building. The reason I picked a abandoned building over a street image building image is because a street image has cars and people that would have to be taken out or replaced.
Camera Matching
After finding the photos that I wanted to use. There was a need to establish a Field Of View and camera angle. None of this information was available with the photo, so I used an Image Modeller Software to match and establish the camera in the scene and place locators to model around when imported into Maya.

Modelling
Importing the scene from the Image modelling software, the first things I did was to lock the camera in position, so you could not rotate or change its FOV. This was to be my render camera. After locking the camera in position I imported the original image as the Camera Image Plane. Using the position of the locators I quickly blocked out the shape of the building using Boxes and Primitives.
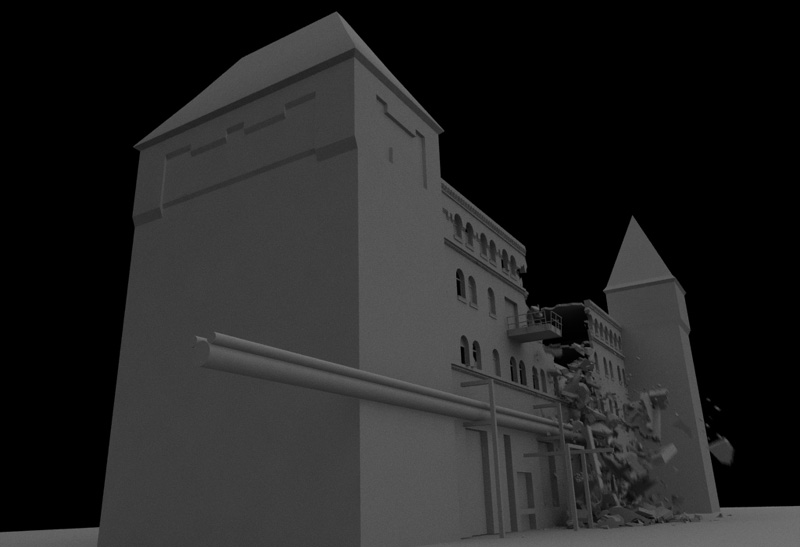
The after deciding which part of the building I wanted to destroy which was to be the Main Wall, I set out to model the to be destroyed Main Wall with great detail and in a manner that would lend it to shattering using the PDI latter on. This meant the wall had to have very clean geo. This also included modelling the inside wall and floors of the building.
To finishing the modelling part of the project I modelled in mid level detail, the position and location of the other parts of the building to be used as collision, for the PDI simulation and later the fluids simulation.
Texturing
Texturing this building needed to be done in a way that would match the style of the original photo. So after laying out the UVs for the Main Wall I created a shader and imported a textures as a projection, using the original camera as the camera to project the image from. After the textures is projected on its baked out using Convert to File Texture setting in Maya hypershade.
In Photoshop the baked out texture is painted on top of, only really used to get the correct colour pallet and some detail locations. Overall the baked out textures rapidly looses resolution on the furthest part of the wall, and that needs to be fixed.
Also the back facing side of the wall will not line up to the photo that was projected so the textures needs to be corrected in that respect.
UVing and texturing the inside walls and the floors using standard methods.
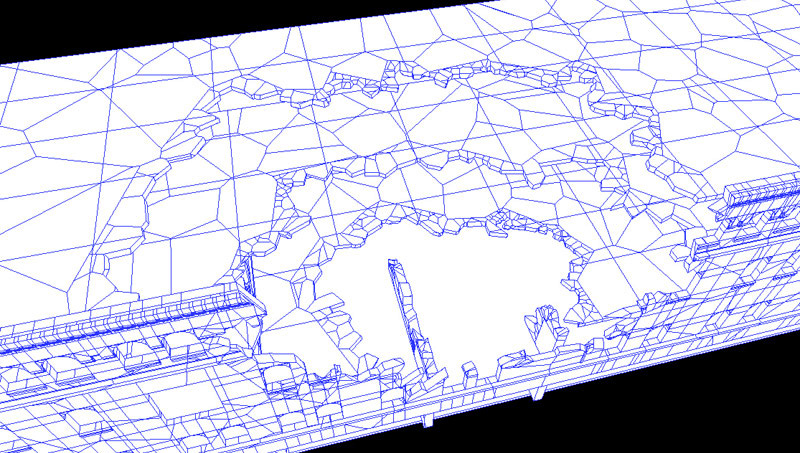
PDI Shattering
Having the Main Wall the Inside Walls and Floors modelled and textured, the wall is ready for shattering. Using the PDI Shatter It Button I broke up the Main Wall the Inside Walls and Floors into 64 pieces each. After which I select out and separated the parts of the Main Wall, Inner Walls and Floors that I wish to be static. Combining all the static geo into one object. Now we are left with a very low poly shattered wall to add variation to broken edge I went through and re-shattered each shattered bit on the edge by 10 or sometimes 20 if it was a rather large chunk. After which I would select the shattered chunk that would be touching the Static geo and Merged them with the static geo. This gives the edge more of a interesting detail.
I set the Static Geo, Ground Plane and other building parts as collision Bounding Body/Mesh/ Passive objects in Create PDI Body.
Then set the shattered parts as Body/Mesh. Separating some parts into a different groups to be easily selectable. The objects in this separate group was given a small velocity away from the walls normal direction, to create a weakness which would come out first.
PDI Baking
Now baking the simulation . This stage for me was a stage of trial and error. Looking in what way the shattered geo falls, making sure the speed and self collision between parts is working in a certain way. Also looking at a large amount of reference footage of bulldozers ripping down buildings. PDI allows to bake to keys in a very straight forward fashion. After the PDI parts are baked into keys
its ready for cleaning up the scene by removing PDI nodes leaving you with geo parts with baked in keyframes.

Adding Instance Particles
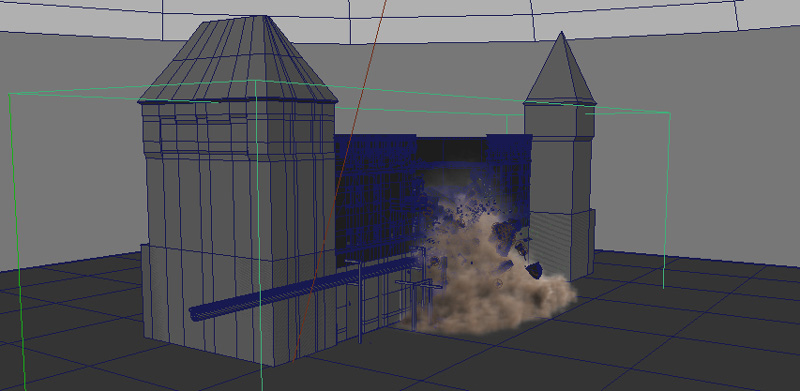
After the shattered geo was baked into keys it was time to added more debris flying down with the shattered chunks. Giving the illusion of more detail and a more realistic collapse. Considering that all the Main Wall parts, Inner Wall parts, Floor parts where separately grouped during the modelling and shattering process, that made it easier to select a number of parts and attach emitters to them. I had hundreds of emitters but only two particles systems. One particle system for instanced bricks and one for instanced concrete. To make the selection of emitters easier I used Mayas Quick Selection Set Shelf Button, so if say I wanted the Main Wall emitting parts to start emitting all at the same time I used the Quick Select Shelf Button which I set and change the values for all the selected emitters in the Channel Box. I set the particles to collide with all the static geo as was done with PDI simulation. Instead of baking the instanced particles into key frames with would blow the scene out in memory I used a simple “seed(id);” expression which is meant to play the instanced particle simulation the same way each time. I added custom expression for scale and rotation and random selection of particle ID with the brick and concrete objects instanced.
Adding Fluids
At this point what needed to be added was the dust. I want to have full control over how much dust comes out when falling and how much dust comes out on impact with the ground. After a few rounds of experimentation, I decided to go with having a new one particle system emitted from the emitters already created attached to the PDI baked parts. This new particle system will die and create a new second particle system on collision and that new particle will emit its own third particle system. This final third particle system would emit the fluids when the parts start to hit the ground. And the first particle system falling through mid air before the collision will emit dust fluids, simulating dust coming from the crumbling building. Using this set up I was able to make fine adjustments and tweak very minutely how much dust was coming out and when.
Lighting & Rendering
Lighting was basic. All that needed to be done was matching the overcast lighting of the original image plate. I used Vray and a directional light with a Geo dome and a light emitting material on that dome.
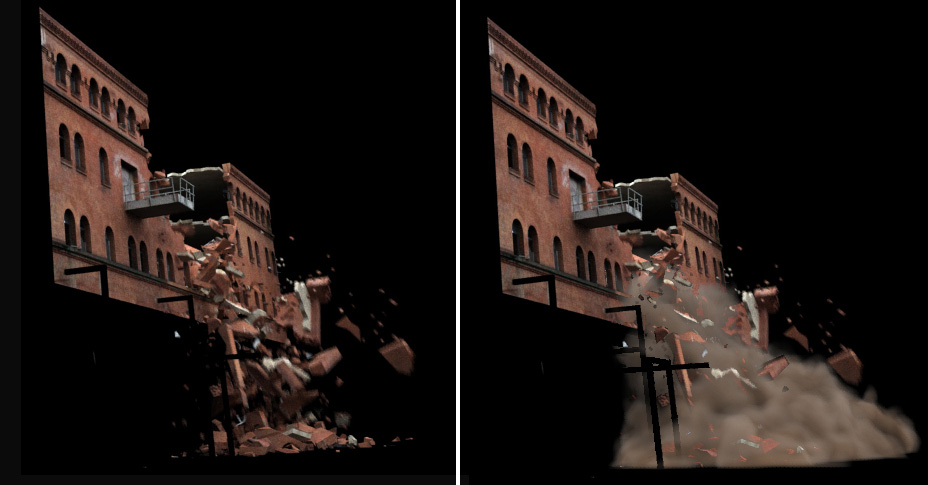
All the collision geo was set to Use background(Vray Mtl Wrapper), so in render image would alpha out all the non collapsing wall yet still receive shadows from falling objects.
The fluids are rendered using maya software because it was faster. On the pass of rendering fluids everything other then fluids was set to Use Background shader.
Final Comp
Putting it all together, adding the rendered wall collapse with the fluid render on top. After all this a slight color grade to match to the original plate and a overall addition of noise.
Shot Breakdown
About the Author
Hi everyone my name is Ivan Khmel. 3D generalist currently living in New Zealand. Originally my study was in illustration , photography, film making and 3d animation. And for the last 7 years I have been working as a generalist 3d artist in the games industry. As of a year ago I have taken up a personal hobby of learning Realistic Visual Effects and am currently working as VFX artist in a iPhone game development studio, which gets me dealing allot more with 2D animation, sprites particle effects and UV scroll animation.
You can see my website here
