
In this article Ivan explains some highlights about the making of this awesome destruction shot using Pulldownit 3 in Max.
Modeling
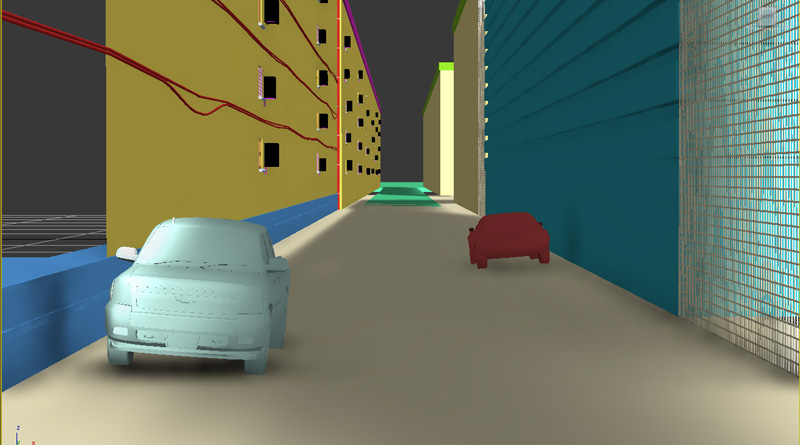
All modeling was done in 3d Max, taking care that models which were going to be fractured were independent and completely closed. The road was sculpted from a polygonal box for generating fragments of the desired thickness.
The buildings have been done from patches, and adding detail with edit poly.
Texturing:
The shaders in this scene are mostly procedural and counts with several maps.
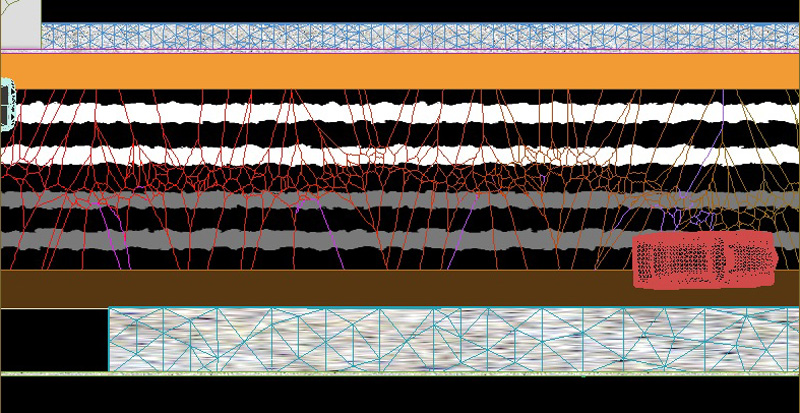
The road has a composite material of 10 levels, the base material is a picture of asphalt and adding other maps for displacement, oil slicks, cracks, holes..and so on to make it as realistic as possible. The border lines are added in a procedural way acquiring the texture and shape of the asphalt.
For the road fragments I have created a mask with 2 shaders, one of asphalt and another of soil just below the road.
The walls of the buildings counts with a base shader of tiled bricks and adding dirt and concrete layers, several graffiti bitmaps are added aswell.
Shattering with Pulldownit
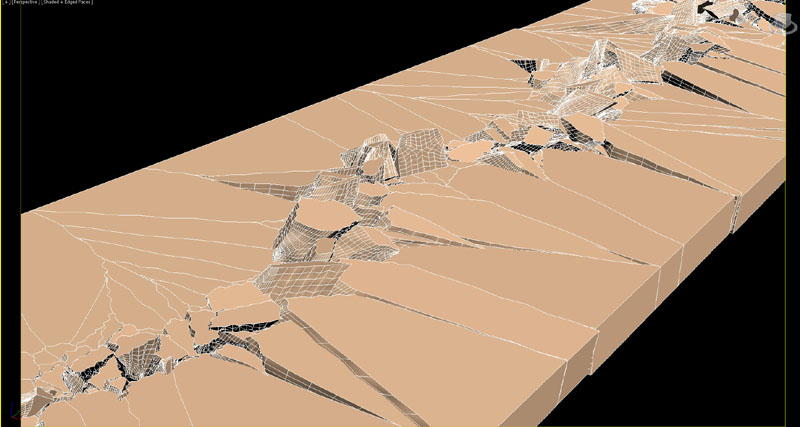
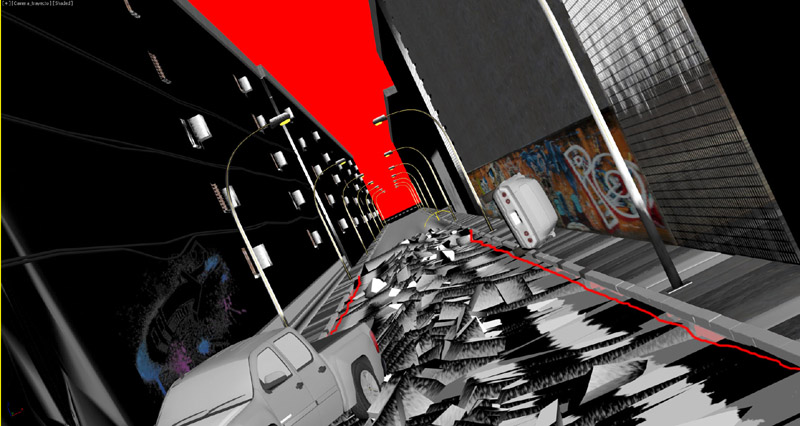
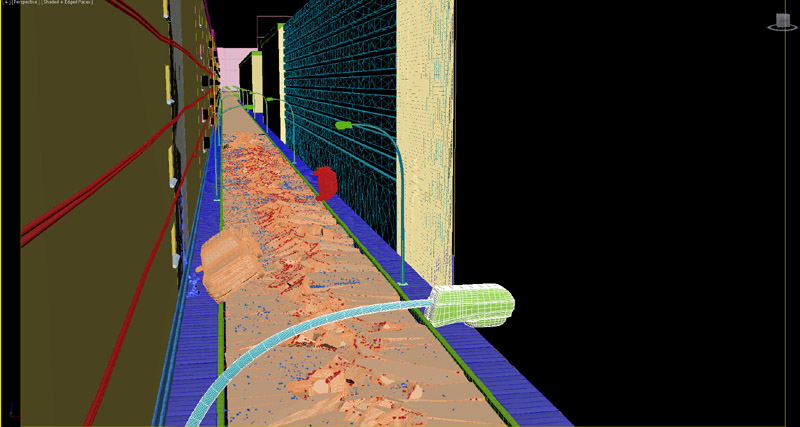
I wanted the crack starting in the middle and my road model was very long, in my first attempt with Shatter it, it was possible to be done, however the fracture body created after that included also the long part of the road which doesn’t break so I decided to split the road first with an slice plane to get this long fragment out of the simulation. So I drew my path over the other part of the road starting from behind it, I did it with a little zigzag for making it more realistic. Then I set path-based shatter and break the model in about 2000 fragments. New Shatterit preview mode was very useful for setting with more ease the extent of the fragments along the path.
Dynamics with Pulldownit
I continued by creating a fracture body for the fragments, and set fracture parameters for cracking surfaces as I had been told, 0% clusterize, static and activation as breaks upon impact and local propagation scheme. After that I created a Pdi Cracker selecting my path as source, when computing the road was breaking but fragments where falling to the void in the middle, I realized that I had to include another large thin box as static object just below the road for preventing this from happening. The new crackers panle was very handy for adjusting the crack effect, I set the impulse direction upwards because it looked nicer to me, and also increasing randomize to the maximum value. The cracking was indeed cool but most of the fragments came to rest without any slope, I wanted them to remain with some slope after cracking, it was easy to achieve adding a wedge object below the road model and setting it as static objet, in this way fragments leaned over it and I had only to hide the wedge in render. After the simulation was done I added more detail to the fragments with the amazing jagginess tool of Pdi and it looked much more realistic.
Adding dust & debris
After the Pdi simulation was done I added more debris using Particle Flow, I created a Pflow source emitting particles from the fragments on the middle of the crack, about 200, making the particles inherit the speed of the fragments at 40% and adding a deflector to make them collide with the road.
In addition I created another Pf source of many tiny particles moving very fast, rendering them with Motion Blur Ive got the feeling of dust being emmited from the crack.
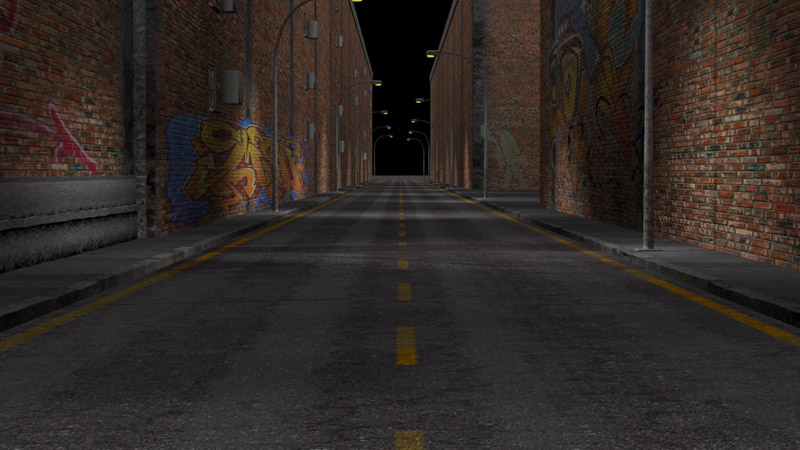
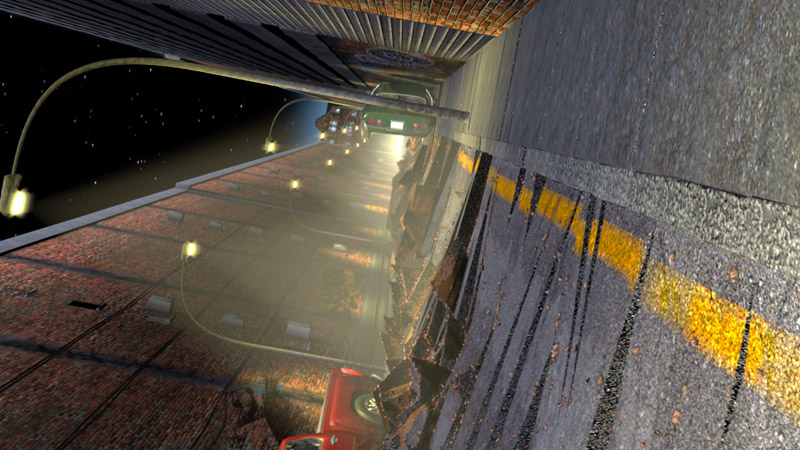
Lighting and Render
The camera trajectory has been animated adding a noise constraint to mimic the natural shake of a camera being hand-held inside a vehicle.
This is a night scene so pretty dark, there is a base ambient light and direct lights coming from the streetlights, a few extra point-lights has been added behind the buildings to enhance the illumination of some areas, all lights in scene counts with volumetric masks.
25 diferent render passes where needed using mental ray
Author: Ivan de Frias
http://vimeo.com/pytonproducciones
