
Pedro Ivan de Frias the author of this stunning shot, kindly explains us how he did the destruction effects using Pulldownit plugin in 3d Max.
This shot was a challenging project because of the amount of different elements fracturing and by other side, due to the close proximity of the camera to the walls, shards had to be generated less polygonal to look real in close-up cracks and detachments . My approach was to work it out in several stages, one for each wall being destroyed, then adding more elements in simulation when I was happy with the overall look and timing of the previous stage.
Cracking the walls
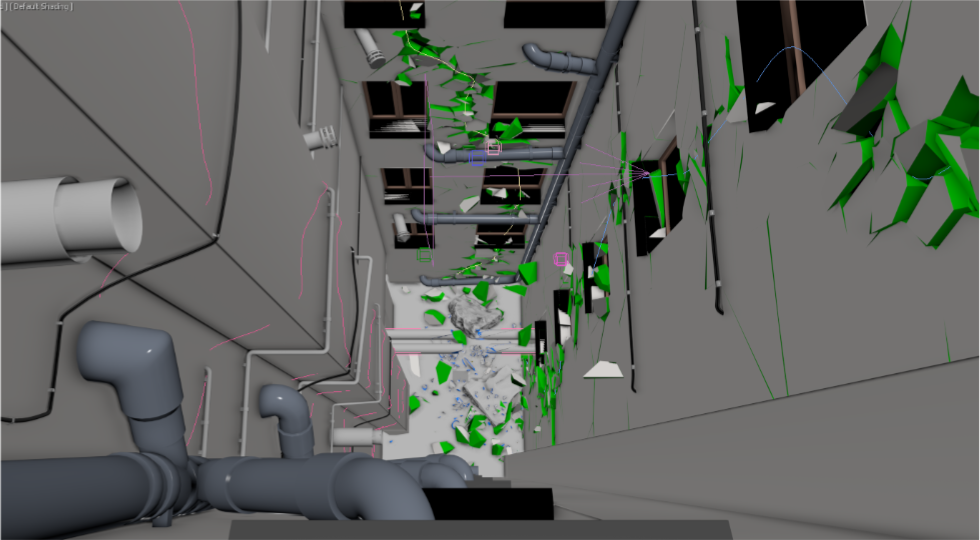
For cracking the front and side walls I followed the same procedure, first drawing a spline over the surface going from the bottom to the rooftop, this is very easy thanks to the great freehand splines in 3ds Max, then using PDI Path Based shatter to create shards along the spline, at first I created 250 shards, however fragments near the camera looked still too big so I did a second pass adding 200 more shards with a lower width value to generate smaller fragments along the path, finally I added a PDI Uniform shatter of the whole wall to remove any too large or too narrow fragment over the surface. I follow by creating a PDI Fracture body for each wall, setting it as static, “only break” and clusterize set to 0 in PDI fracture options.
After creating a PDI cracker object following the spline trajectory and adjusted it size to be very small, when playing the simulation the wall started to crack nicely along the spline but I had to set also local propagation in PDI fracture options to prevent fragments detaching in advance.
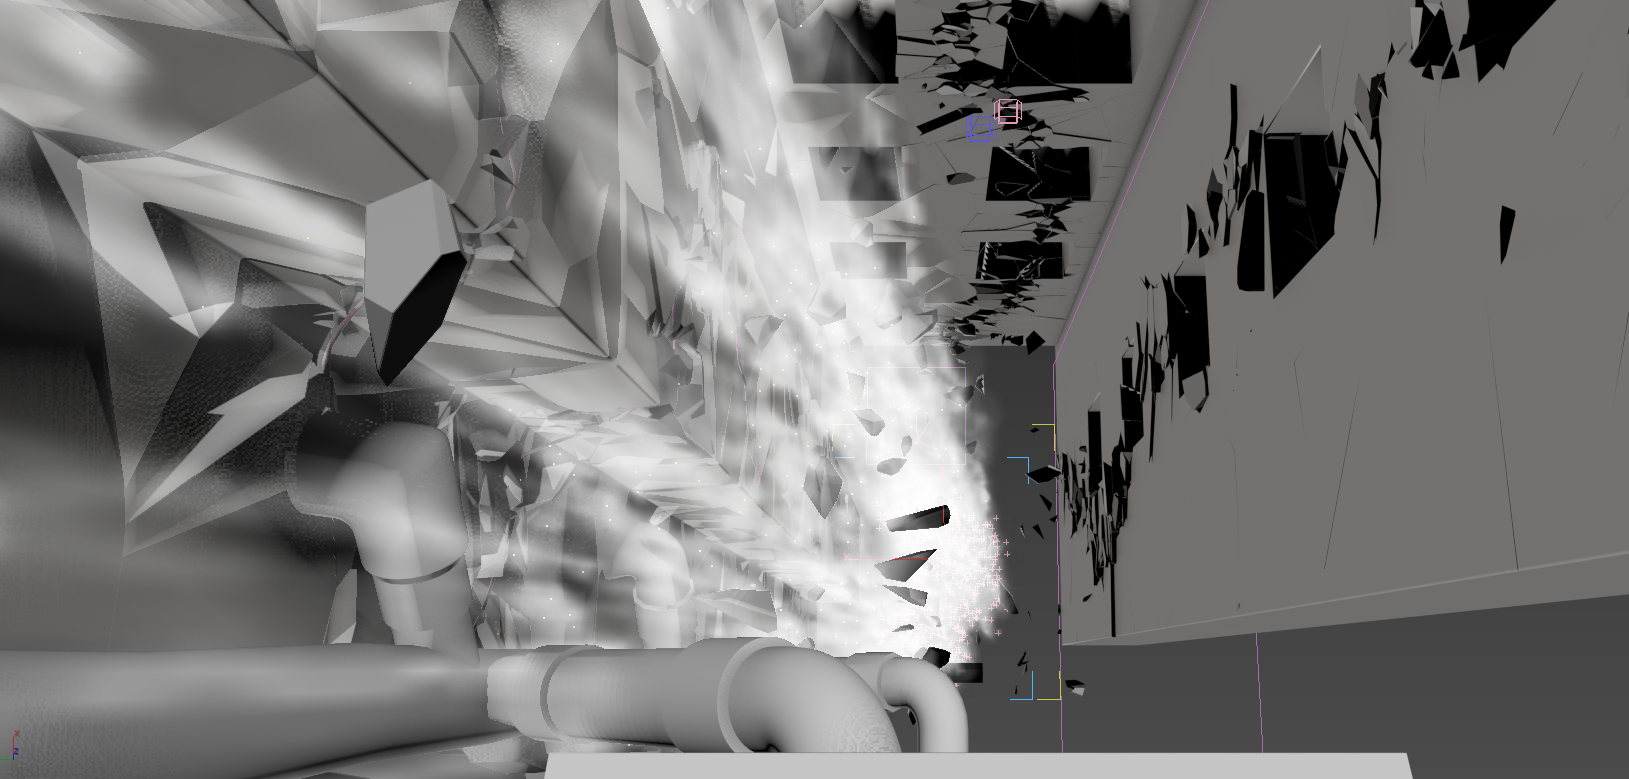
The simulation looked good but almost all fragments along the path got detached and falling to the ground, I preferred the broken fragments to protrude over the surface without falling, but any of the PDI fracture options seemed to perform this behavior, I solved it by adding a thin box aligned to the wall but with a small gap between them, by setting it as a PDI static body I got the fragments standing after detaching, I had just to hide the thin box to get a nice protruding crack over the wall.
Exploding the wall on the left

The wall on the left crumble in a different way than the others, It explodes and crack as a whole, not just along a defined path, to achieve the effect this time I used a 3ds max wind field to trigger the destruction. First I draw a spline crossing the wall widely from left to right and making several twist in its way to the roof; then I shattered the wall using PDI path based style in around 250 shards along the spline and adding 250 more shards, setting a smallest width value, but only in the part of the wall nearest to the camera.
I followed by creating a PDI fracture body for the wall, and set it as only breaks and clusterize set to 0 in the PDI fracture parameters, I also checked affected by force fields box, I animated wind strength going from 0 to a maximum 100 units in frame 30, then decaying again until vanishing at frame 50. When running the simulation, I’ve got an appealing destruction of the whole wall, with smaller fragments being pushed out farther than bigger ones. However, I wanted most of the wall to not move at all, for achieving this I set all large chunks as static in PDI advanced fractures getting the nice exploding effect.
Adding more elements in simulation

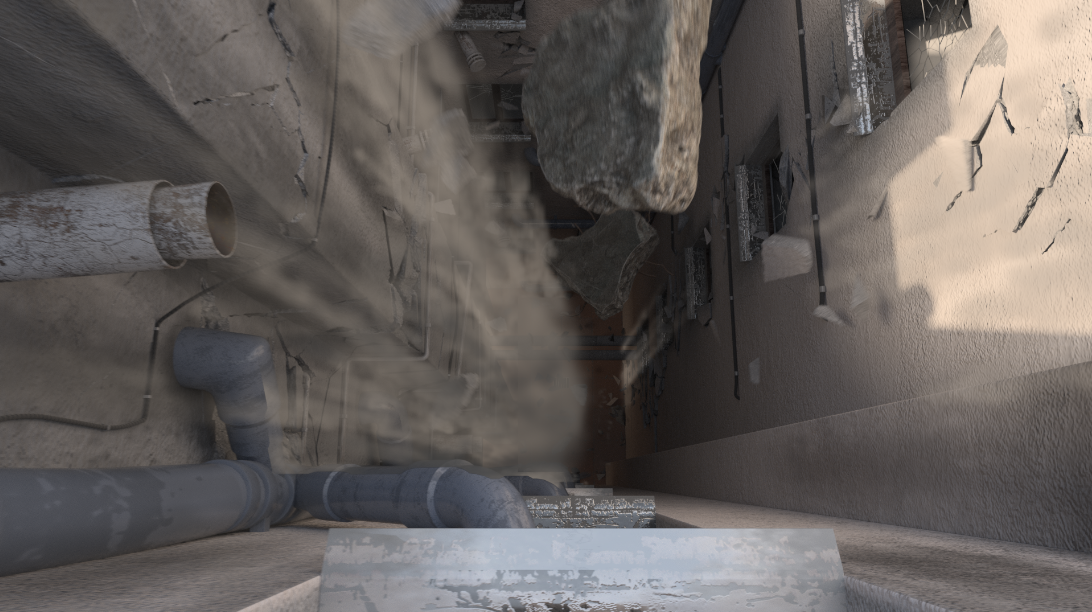
At this point I had all my walls being destroyed nicely but I wanted to add more elements to make the scene more massive and impressive . I added two giant debris falling from the ceiling beyond the camera, that looked definitively good. The models were taken from a nice debris package by Everlite, I used PDI to simulate the motion of these huge pieces as rigid bodies, simply adding a random initial spin for them and gravity did the rest. Once of the chunks collides with the pipes in the ground floor so included the pipes in simulation using local shatter and setting a PDI fracture body for them, again I set the parts I didn’t want to move as static in PDI advanced fractures. Finally, I shattered some windows of the facade, for achieving this nice effect I applied a radial shatter pattern to the windows but didn’t compute dynamics for it, simply animated visibility to make the shards appearing at the exact moment.
All these new elements were added after all walls destruction was already baked, so no way to affect or modify it, however added fragments could still collide with baked geometry, that’s a very nice feature of Pulldownit when you want to add more elements to a simulation already baked.
Final Adjustments

Once all the destruction was done, I made a preview of the simulation to check dynamics and timing, I cropped keys for some fragments on the left wall to make them stick on the surface while still seeing the cracks. I had the feeling timing was a little slow , so I did all destruction a 20% faster using 3ds Max re-scale time feature which works great.
I replaced the PDI cut material for a more realistic Vray material and added PDI Jagginess to all fragments except those of the pipes as they are seeing far away, I strengthen PDI Jagginess for the fragments close to the camera which looked still too flat. Definitively close-up fragments looked much realistic after adding quite a few of roughness to them and PDI does it almost automatically and very fast, that another amazing feature of this plugin.
Finally I added a camera shake effect strengthen it when the left wall explodes and making it vanishing slowly until the end.
Adding Dust
Dust was added in a second pass using Fume Fx and I used Particle Flow in 3ds Max to guide the emission of smoke, in the left wall I set the same spline I have used to crack the surface as emitter of particles, in the other wall I emitted particles directly from the detaching fragments.
I decided to emit lot of dust from the left wall because it was kind of exploding and a soft amount of dust in the right wall to not populate the scene with too much smoke and can still see the fragments detaching and falling. I didn’t add any dust to the crack on the front wall for the same reason.
To make the particles exploding along with the fragments I simply set a pFlow speed operator with a large value and adjusted a gravity force to make particles falling quickly.
The main issue to get dust looking good was setting Fume Fx Spacing value very low, because the camera was very close to the smoke, indeed it was located inside the fluid container itself. Aside this I was testing with all Fume dissipation parameters until getting the dust behaviour I wanted for the scene. Regarding rendering I had to reduce light multiplier in FumeFx render tab to make the illumination of the smoke less brighten. I finally composed dust in Fusion adjusting Alpha gain and Burn parameters.
Conclusions

This scene involved quite a lot of elements being destroyed, I must say Pulldownit behaved fast and stable at all moment and the ability to can add more elements in simulation in different stages was very helpful to can focus in the destruction of one wall at a time.
I liked specially generating cracks along paths is very easy using this plugin, and you have fine control over the strength of the shockwaves but having more options to control the timing of the cracks propagation will be useful.
PDI Jagginess is a great feature to generate more realistic fragments adding the amount of roughness you like specially in close-up views.
