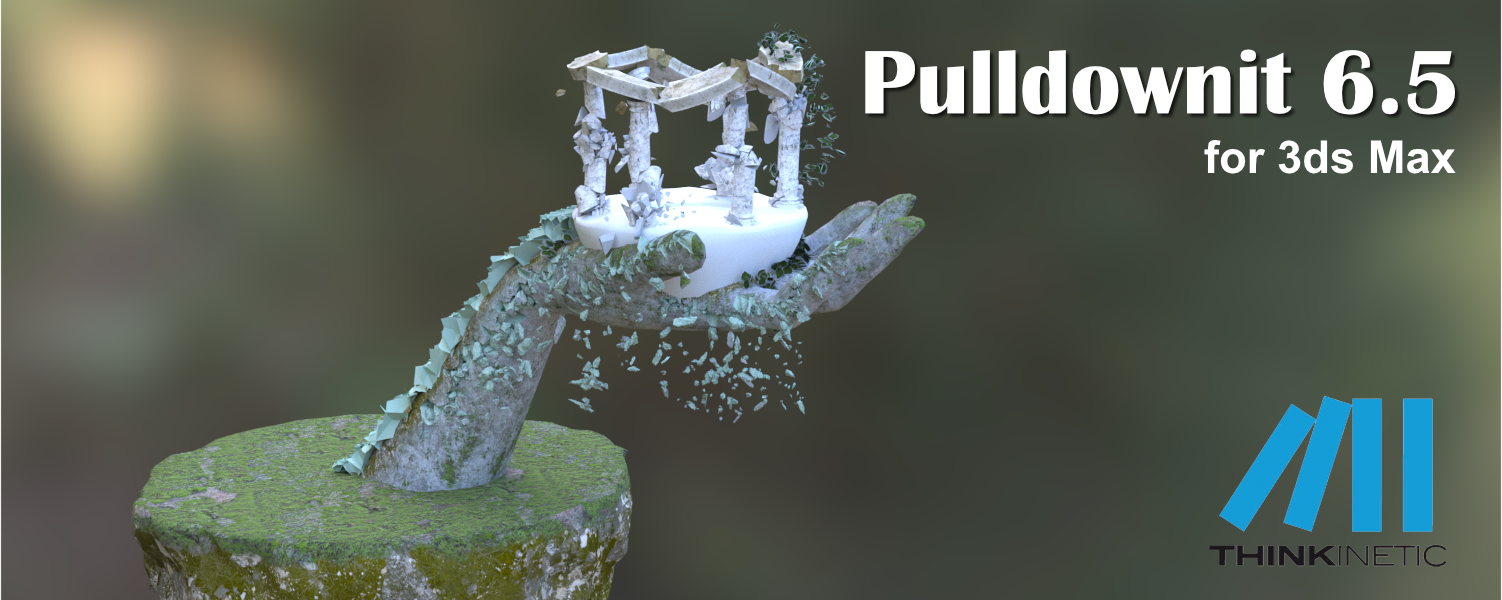
Pulldownit plug-in for 3ds Max updates to version 6.5, adding useful features to the non-destructive workflow introduced in previous version and fixing some usability issues.
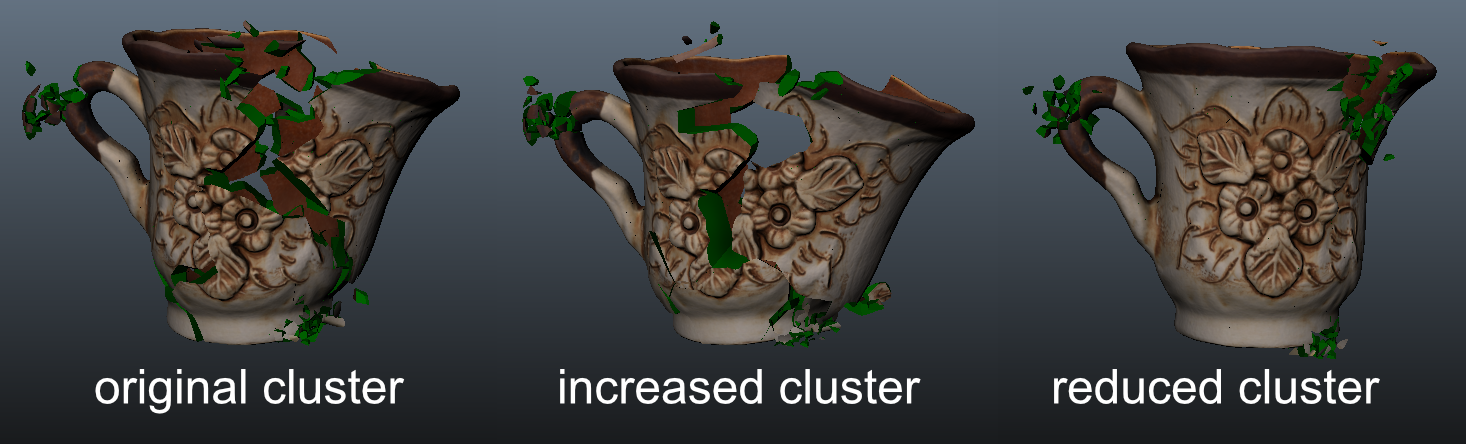
New ability toincrease or reduce fracture clusters size, alongside the Edge Fracture tool you can easilly add debris on detaching clusters or re-size exploding areas at ease.
New “Eraser” tool to reduce fragmentation, allowing artists to get quality fracture results while maintaining control over the number of fragments generated, you can visually erase shattering areas and play the simulation immediately, undo last operation or recover the original shattering at any moment.
New ability to change source node of a breakage, allowing artists to apply an existing breakage to a different model, or re-use it as starting point for a new destruction effect.
There are also several bugs fixed, you can check the whole list of fixes in the Pulldownit version logs page:
Licensed users can already access Pulldownit 6.5 from his account and there is a demo version for 3ds Max 2027 in the Thinkinetic web site.
Shatter New Features
New Erase Fracture Tool, this new tool allows to reduce fragmentation on the model interactively, you can undo your changes at any moment.
New Re-shatter option “Set Current as Base Breakage”, this new option allows to set current shattering as base breakage, you can revert to base breakage at any moment.
Dynamics New Features
New ability to resize fracture clusters, now you can reduce or increase fracture cluster size at ease just by clicking in the intended buttons and compute simulation immediately.
UI Enhancements
New Shatter it “Select Source Node” button, by clicking on it you can ser a new geometric node as source for the current breakage.
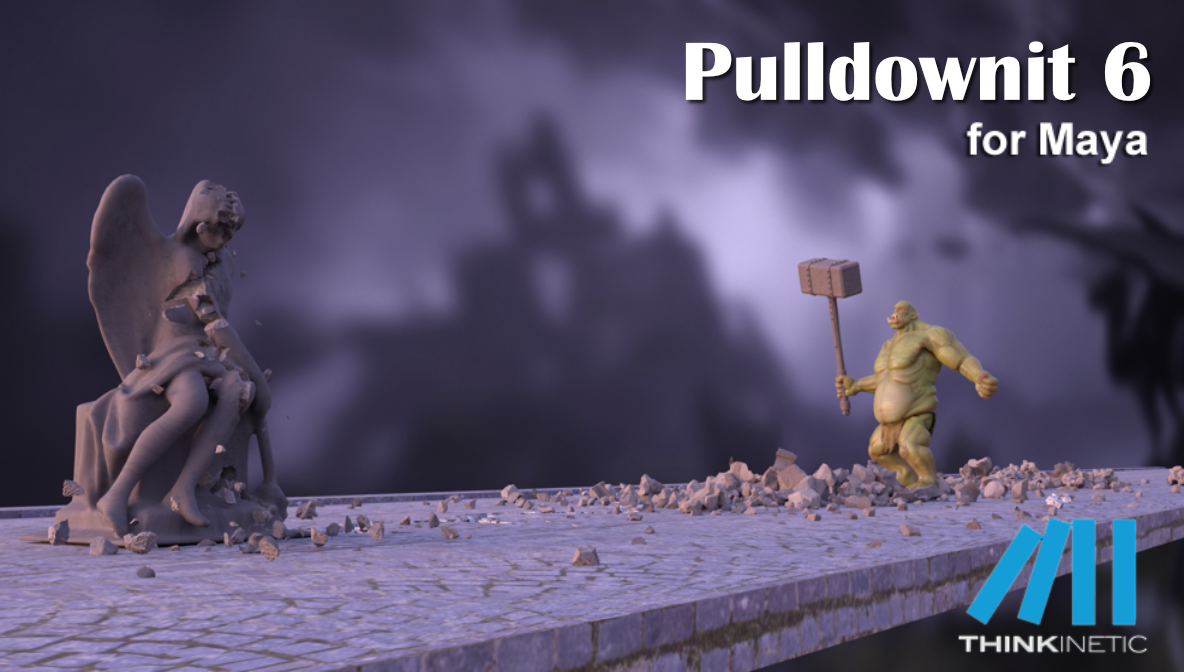
We are thrilled to announce Pulldownit plug-in for Mayagets a non-destructive workflow, allowing to sculpt fractures over the model freely, visually chipping the areas you want and computing dynamics immediately, or modifying the original model transform or shape and its associated fracture body will update accordingly, you can undo latest changes or revert to original shattering at any moment.
Maya mesh modifiers are supported, there are only a few known limitations with some modifiers that you can review in the Maya Script Editor Pane.
In addition now is possible to increase or reduce fracture clusters size, alongside the Edge Fracturefeature introduced in v 6.0 makes very easy to adjust perfectly detaching or exploding areas.
There are also several useful UI improvements you can review below and you can check the whole list of fixes in the Pulldownit version logs page:
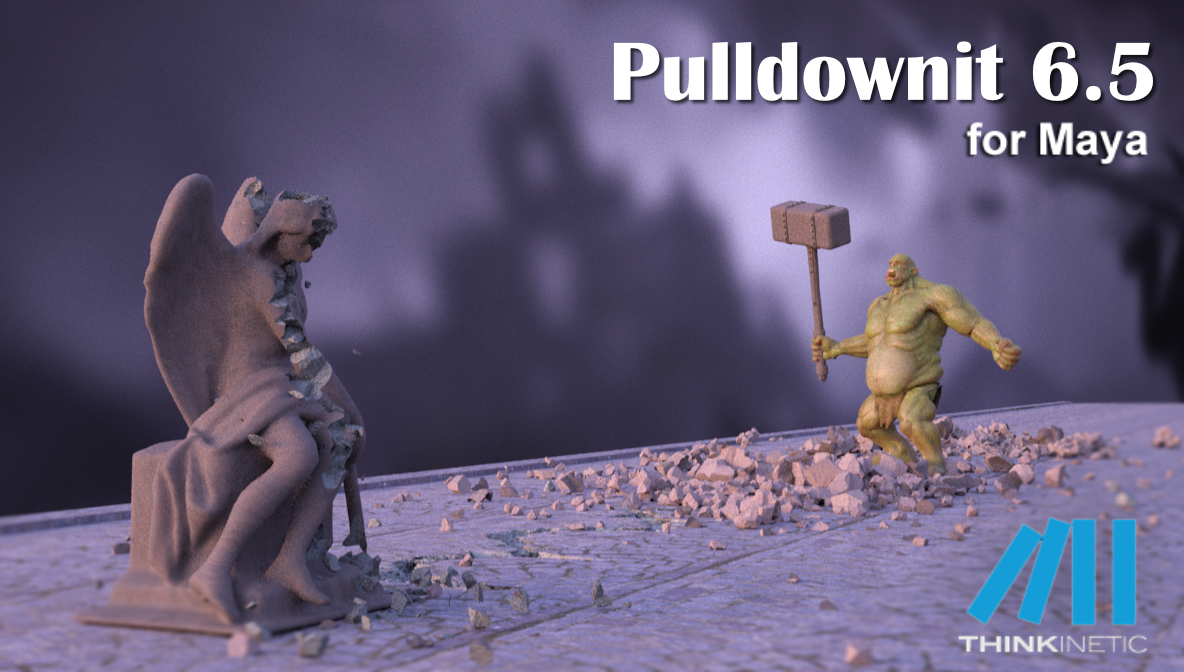
Licensed users can already access Pulldownit 6.5 from his account and there is a demo version for Maya 2026 in the Thinkinetic web site.
Shatter New Features
New Non-Destructive shatter workflow, reshatter areas, change the original model transform or shape and recompute dynamics immediately, Maya Mesh modifiers are supported.
Shatter it supports Xref Objects, Xref objects can be shattered seamlessly and are supported by non-destructive shatter workflow(with the inherent limitations of using Xref objects in a Maya scene).
New Reshatter option “Set Current as Base Breakage”, this new option allows to set current shattering as base breakage, you can revert shattering to base breakage at any moment.
Dynamics New Features
New ability to resize fracture clusters, now you can reduce or increase fracture cluster size just by clicking in the intended buttons and compute simulation immediately.
UI Enhancements
New Shatter it window layout, making it more intuitive by showing only parameters affecting the selected shatter style.
New Shatter it SwatchDisplayPort, this new visual widget displays an icon of the selected shatter group cut material, you can access cut material properties just by clicking over it.
New Shatter it “Show/Hide source node” button, after clicking on it you can transform source node or modify its mesh freely.
New Shatter it “Refresh Breakage from Source” button, by clicking on it shattering is refreshed from the current source node transform and shape.
New Shatter it “Revert to Base Shape” button, by clicking on it source node shape is reverted to original state.
New Reshatter option “Update Base Shape”, by clicking on it source node base shape is updated to current state.
This new version of the plugin is focused on fast and easy fractures refinement to get polished destruction effects of your model quickly.
We are thrilled to announce Pulldownit plug-in gets a non-destructive workflow in 3ds Max, allowing to sculpt fractures over the model freely, visually shattering it in the areas you want and computing dynamics right away, or changing the original model position, orientation, scale or shape and all existing fractures will update accordingly, 3ds Max modifiers are supported.
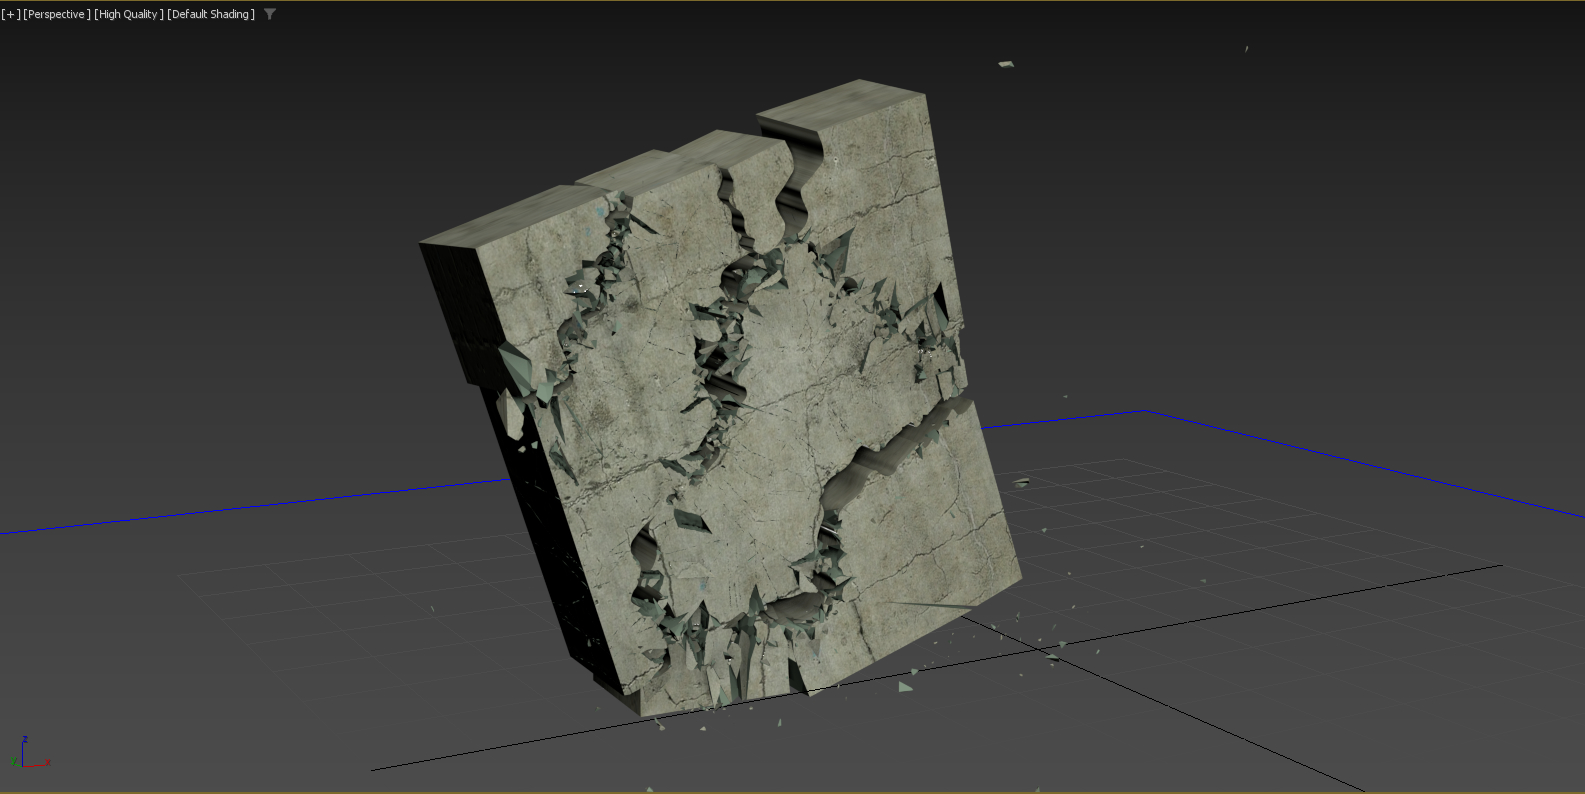
In the same line we introduce a new Edge Fracture Tool to easily chipping inner borders of selected fragments, the tool works in an interactive way, simply selecting fragments in viewport to shatter its edges and play the result, you can recover the original breakage at any moment to start again.
Replace cut material can now be done at any stage of the destruction scene, even after baking simulation keys and it supports jaggy fragments, in addition a different base color is set for the new material created to easily check the fragments affected.
PDI Alembic exporter has been revamped, now it is able to export thousands of objects as a single Alembic mesh in seconds. In addition, PDI auto-loads the Alembic file in the 3ds Max scene after export , you can check it, apply original shaders to it, and if needed recover original geometry nodes just by deleting the Alembic mesh.
There are several other performance and usability improvements you can review below and you can check the whole list of fixes in the Pulldownit version logs page:
Licensed users can already access Pulldownit 6.0 from his account and there is a demo version for 3ds Max 2026 in the Thinkinetic web site.
Shatter New Features
New Non-Destructive shatter workflow, shatter pattern can be modified in any way and recompute dynamics right away, change the original model position, orientation, scale and 3ds Max modifiers are supported.
New Edge Fracture Tool, this new tool allows to visually chipping on inner borders of selected fragments, it works in an interactive way , you can reshatter fragments and play the simulation right away, undo last operation or recover the original breakage at any moment.
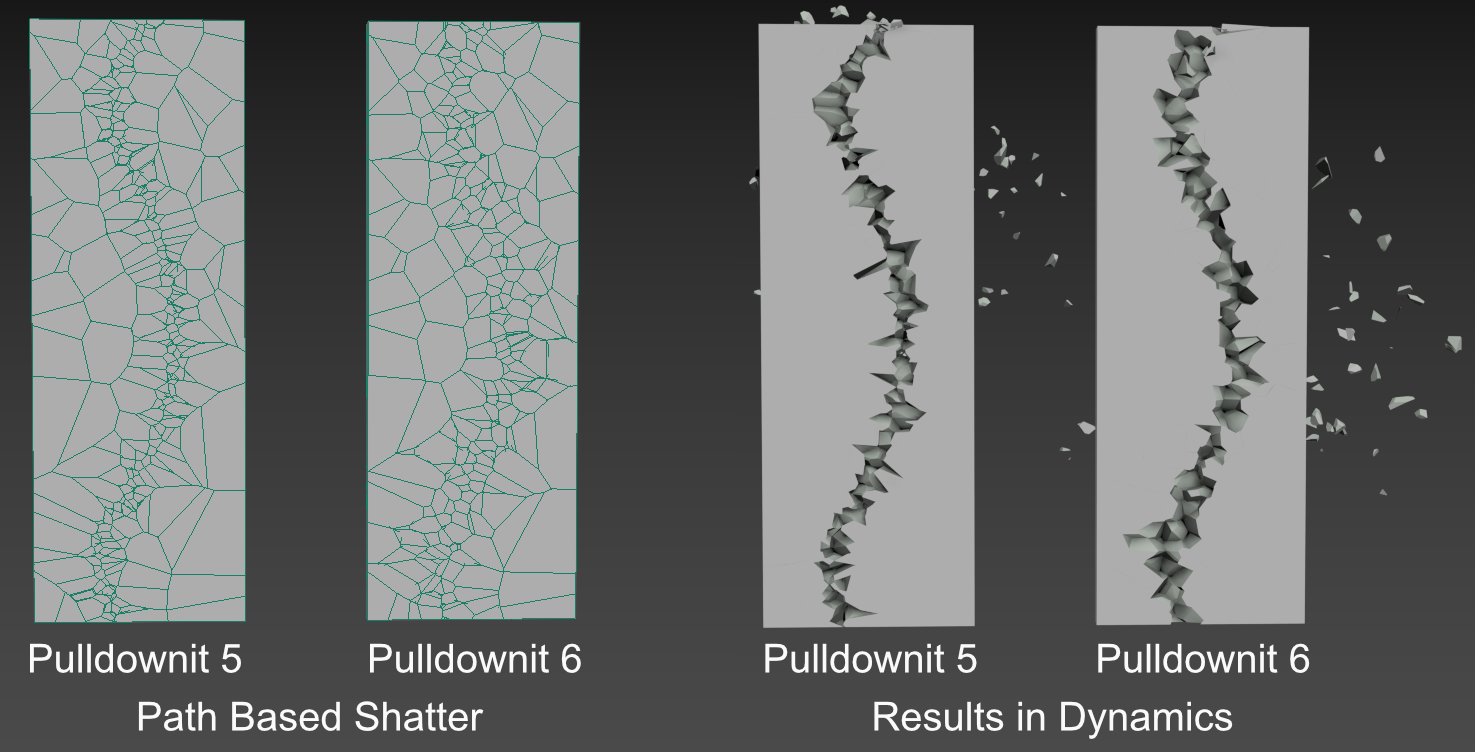
Improved path based shatter quality, path based shatter now generates rounded shards across the path, producing more realistic results in dynamics for stone-like materials.
Auto replace cut material supports jaggy fragments, replace cut material can now be done at any stage of the destruction scene, it affects the selected shatter group only, jaggy fragments and baked fracture objects are supported, in addition it sets a different base color for the new material making the checking of fragments affected much easier.
Dynamics New Features
Improved Clusterize pattern, clusterize parameter now generates nonaligned clusters getting more realistic fracture results, besides falling Fracture Bodies are now forced to break in the area of collision with static surfaces without the need of further adjustment.
Fracture Body “Relative to Mass” now adjust to “hardness”, getting easily more debris in impact areas just by making the model more brittle.
New cluster option “Excluded from Cracks Propagation”, this new parameter forces the cluster to break upon direct collision only, preventing it to be detached in advance because of cracks propagation or force fields affecting the whole fracture body.
New cluster option “Relative to Mass”, enabling this option clusters involving small and large fragments prefers to break in the chipping areas first, this option is now the default for clusters creation.
Alembic exporter 20x faster, export fracture simulation to Alembic now takes just a few seconds even for thousands of objects involved
UI Enhancements
Cut Material color auto change after Make New, replacing a shatter group material now sets a different color for the new material created so you can easily differentiate it from the old one.
Added “Bake All” option to PDI Simulation tab, this new option allows you to bake all PDI bodies in scene at once, removing all PDI data and letting only animation keys in the scene.
In this polished tutorial Esteban Cuesta show us how to destroy the scenery using Pulldownit plugin in 3ds Max, he explains how to shatter and dynamically destroy all objects colliding with an animated model along its ride through a narrow tunnel, add roughness to fragments and bake the simulation, worth to check out!
The Death Tyrant Model showed in the tutorial has been created by Andres de Mingo, you can find an awesame 3D printed version here:
Pulldownit 6 for Maya brings new destruction features and important updates in performance and usability. This new version of the plugin is focused on fast tweaking and repeatability, and easy fractures refinement to get polished destruction effects of your model quickly.
For this we introduce a new Edge Fracture Tool to easily chipping on inner borders of selected fragments, the tool works in an interactive way, allowing to reshatter selected fragments and play the simulation right away, and it is non-destructive so you can undo last operation or recover the original breakage at any moment to start again. In addition, you can watch the amount of fragments generated to prevent running over your polygon budget, specially convenient for real time effects.
In the same line replace cut material can now be done at any stage of the destruction scene, even after baking simulation keys and it now supports jaggy fragments, in addition a different base color is set for the new material created, so you can check the fragments affected immediately.
Dynamic long cracks have been improved producing more realistic results for stone-like materials and thousands of instanced shapes in dynamics computes up to 30% faster.
Fracture clusters counts with new parameters to fine control when and how an object breaks.
There are also several useful UI improvements you can review below and you can check the whole list of fixes in the Pulldownit version logs page:
Licensed users can already access Pulldownit 6.0 from his account and there is a demo version for Maya 2025 in the Thinkinetic web site.
Shatter New Features
New Edge Fracture Tool, this new tool allows to visually chipping on inner borders of selected fragments, it works in an interactive way and is non-destructive so you can reshatter fragments and play the simulation right away, undo last operation or recover the original breakage at any moment.
Improved path based shatter quality, path based shatter now generates rounded shards across the path, producing more realistic results in dynamics for stone-like materials.
Auto replace cut material supports jaggy fragments, replace cut material can now be done at any stage of the destruction scene, it affects the selected shatter group only, jaggy fragments and baked fracture objects are supported, in addition it sets a different base color for the new material making the checking of fragments affected much easier.
Dynamics New Features
Instanced rigid bodies faster performance, Instanced shapes in dynamics computes up to 30% faster speed, that means thousands of shapes simulated in a few minutes.
Fracture Body “Relative to Mass” now adjust to “hardness”, getting easily more debris in impact areas just by making the model more brittle.
Improved Clusterize pattern, clusterize parameter now generates nonaligned clusters getting rid of the blocky look when fracturing an object with auto clusters, besides falling Fracture Bodies are now forced to break in the area of collision with static surfaces without the need of further adjustment.
New cluster option “Excluded from Cracks Propagation”, this new parameter forces the cluster to break upon direct collision only, preventing it to be detached in advance because of cracks propagation or force fields affecting the whole fracture body.
New cluster option “Relative to Mass”, enabling this option clusters involving small and large fragments prefers to break in the chipping areas first, this option is now the default for clusters creation.
UI Enhancements
New option to set “current frame” for any fracture event, just by dragging the Maya time-slider you can set the current frame for any fracture event by clicking in the event “ST” side button.
New option to set “current frame” for any rigid body event, just by dragging the Maya time-slider you can set the current frame for any rigid body event by clicking in the event “ST” side button.
New option to set “current frame” for any cracker event, just by dragging the Maya time-slider you can set the current frame for any cracker event by clicking in the event “ST” side button.
New option to change seed for rigid body initial velocity/spin, by clicking the new “NS” button next to random velocities’ parameters you will play the simulation with a different initial velocity/spin for all the rigid bodies selected.
New option to add random velocity/spin to fracture bodies.
New option to change seed for fracture body initial velocity/spin, by clicking the new “NS” button next to random velocities’ parameters you will play the simulation with a different initial velocity/spin for all the fracture bodies selected.
In this great tutorial Esteban Cuesta shows us how to use the freehand spline tool and boolean modifier in 3ds Max 2024 to make rough custom cuts over a model, then turn cracks look “organic” by using the Pulldownit plugin to generate secondary cracks and debris on top of it.
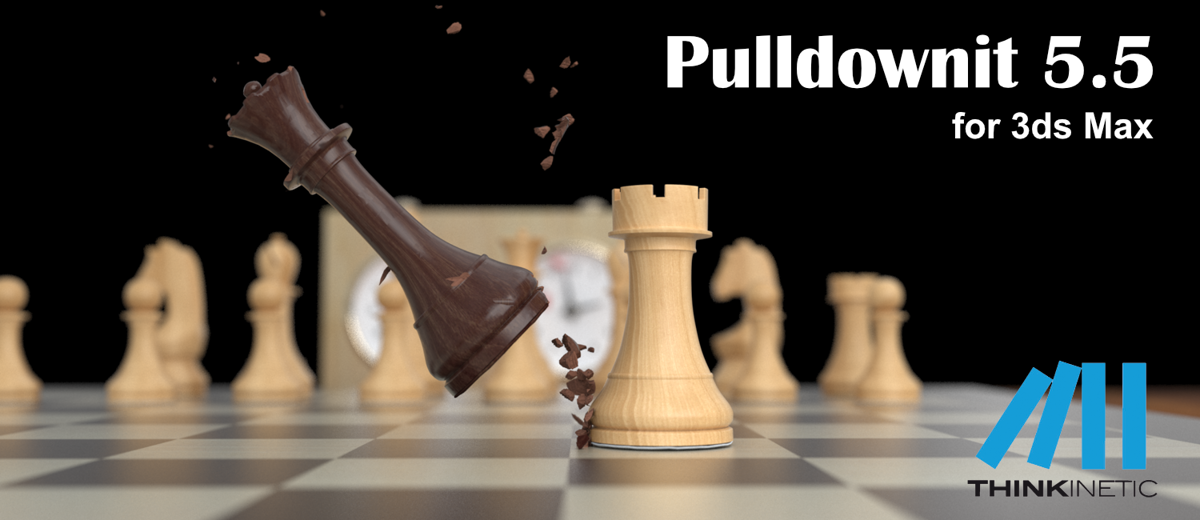
Pulldownit 5.5 for 3ds Max comes with important updates, Shatter ittool has been multithreaded and highly optimized, getting up to 4x faster shattering with regards to previous release, allowing to shatter hi-poly models in hundreds of fragments in a few seconds. Creating Chipping areas on the model is now faster as you can discard shatter centers directly in the viewport just by clicking the mouse over it.
Cracks generation computes now 2x faster and Bounded Cracks has been enhanced with the ability to turn them dynamic at the desired frame, allowing to create easily stress cracks that ends up tearing the surface completely at some moment.
Working in complex destruction scenes is easier and more intuitive, in cases of many objects fracturing, dynamic solver has been adjusted to get nice fracture results with default parameters and when two objects collide each other you can decide which of them will break in first place simply by reducing its hardness value.
Regarding the UI, in this new version you can create several fracture objects at once or create several crackers at once and modify them, there are other nice additions like toggle display of all crackers paths with one click.
Last but not least we have fixed quite a few annoying issues from previous version, making the tool more predictable and reliable than ever.
You can review below all performance and usability improvements and you can check the whole list of fixes in the Pulldownit version logs page:
Licensed users can access already Pulldownit 5.5 from his account and there is a demo version for 3ds Max 2024 in the Thinkinetic web site.
Shatter New Features
Shatter it multithreaded, getting up to 4x faster shattering allowing to shatter an object in hundreds and thousands of pieces in a few seconds.
New ability to remove shatter centers directly in the viewport, when in Shatter it draft mode simply by clicking mouse + ctrl key, the selected shatter center is deleted.
Dynamics New Features
Cracks Generation 2x faster, stress cracks or combinations of stress and dynamic cracks now computes 2 times faster.
New ability to generate Bounded Cracks until frame , stress crack propagation can be set to last until desired frame, after that it continues as an usual dynamic crack.
Initial velocity can be set for “activation at frame” fracture bodies, linear and angular velocity can be added to static fractures bodies, setting in this way the initial motion direction when the object becomes dynamic.
More intuitive behaviour in collision between fracture bodies, user can decide which of them will break in first place simply by reducing its hardness value. Besides small fragments collisions don’t trigger fracture anymore, therefore fracture activation starts always at the exact impact moment between the two objects.
UI Enhancements
New Ability to create several fracture bodies at once
New ability to set parameters for several fracture bodies at once.
New ability to set initial velocity at random for many fracture bodies
New ability to edit name of selected Cracker.
New ability to show/hide all Crackerspaths at once.
New ability to set parameters for several Crackers at once.
New ability to create Crackers for all parented curves at once.
Sony Santa Monica has published a nice article and video about Art Blast in latest God of War game showing destruction effects and beautiful environments that can be cracked and damaged during the game.
Blasting through structures, cracking ice, shattering earth – the Breakables Team makes each crash look just as satisfying as it feels in-game.
Aside in-game physics they have used baked simulations with Pulldownit in Maya adding hand key modifications to get the look they wanted, indeed Pulldownit plugin allows to fix or modify baked simulation easily by editing animation keys for fragments or rigid bodies.
Besides Cynthia Fenton, breakable artist at Sony Santa Monica Studio, has posted a stunning video showing his work in God of War Ragnarok using Pulldownit plugin for destructions effects, you can see it here:
Pulldownit 5.5 is here and comes with useful updates, Shatter it tool has been multithreaded and highly optimized, getting up to 8x faster shattering with regards to previous release. Chipping areas of the model is also faster and you can discard shatter centers directly in the viewport just by clicking the mouse over it.
Bounded Cracks introduced in version 5.0 has been enhanced with the ability to turn them dynamic at the desired frame, allowing to create easily stress cracks that ends up tearing the surface completely at some moment.
Working in complex destruction scenes is easier and more intuitive, in cases of many objects colliding, dynamic solver has been adjusted to get nice fracture results with default parameters and when two objects impact each other you can decide which one will break in first place simply by reducing its hardness value.
Maya Cache Playback is now supported after baking simulation keys for the whole scene, this allows user to play the simulation at a fast, sustained rate and recover dynamic data afterwards to make changes if needed.
There are also useful improvements to the UI, you can modify parameters for several fractures at once and create several crackers at once or toggle display of all crackers paths with one click.
Last but not least we have fixed quite a few annoying issues from previous version, making the tool more predictable and reliable than ever.
You can review below all performance and usability improvements and you can check the whole list of fixes in the Pulldownit version logs page:
Licensed users can access already Pulldownit 5.5 from his account and there is a demo version for Maya 2023 in the Thinkinetic web site.
Shatter New Features
Shatter it multithreaded along with other performance improvements that makes shatter an object in hundreds and thousands of pieces around 8x faster than in previous release.
New ability to remove shatter centers directly in the viewport, when in Shatter it draft mode simply by clicking mouse + ctrl key, the selected shatter center is deleted.
Dynamics New Features
New ability to generate Bounded Cracks until frame , stress crack propagation can be set to last until desired frame, after that it continues as an usual dynamic crack.
Initial velocity can be set for “activation at frame” fracture bodies, linear and angular velocity can be added to static fractures bodies, setting in this way the initial motion direction when the object becomes dynamic.
More intuitive behaviour in collision between fracture bodies, user can decide which of them will break in first place simply by reducing its hardness value. Besides small fragments collisions don’t trigger fracture anymore, therefore fracture activation starts always at the exact impact moment between the two objects.
UI Enhancements
Maya Cache Playback supported after baking PDI keys for the whole scene, deleting PDI data before using Maya Cache Playback is no longer needed, allowing to recover simulation afterwards to make changes if needed.
New option to auto clean all PDI data after baking simulation, this new option allows to use Maya Cache Playback at the fastest speed right after baking PDI keys.
New ability to set parameters for several fracture bodies at once. New ability to edit name of selected Cracker. New ability to show/hide all Crackers paths at once. New ability to set parameters for several Crackers at once. New ability to create Crackers for all selected curves at once.
Some of Pulldownit users has asked us how we did the stunning cathedral destruction in latest PDI reel, so we have decided to make a video tutorial explaining it step by step, and as you can see in the video below , it isnt dificult indeed,
Thank you to Esteban Cuesta for this great tutorial and final shot, please remember to “like” the video if you liked it:)