Esteban Cuesta has done a great tutorial about cracking ground and breaking obstacles with an animated object using latest version of Pulldownit in 3d Max and also in Maya
3d Max tutorial:
Maya tutorial:
hope you like it

Esteban Cuesta has done a great tutorial about cracking ground and breaking obstacles with an animated object using latest version of Pulldownit in 3d Max and also in Maya
3d Max tutorial:
Maya tutorial:
hope you like it
Andres de Mingo explains how he broke the animated Golem in dynamics and other technical details about this funny shot.
Modeling the environment
The environment of the scene was modeled in 3d Max using polygonals modifiers and adding roughness to the mountains in ZBrush, for not increasing too much the poly count, I applied the changes as a normal map when coming back to 3D Max.

Shading was applied using the Polypaint tool of ZBrush using several HD pictures of stones as a basis. For the little stones here and there I used a particle system in 3d Max to spread them over the ground and instancing them as geometry. The sky is a simple plane with an animated FFD modifier to get the feeling of clouds are moving on the background.

Modeling the Golem
I started modeling the Golem in Max creating a low poly version of the overall shape. I had to convert this solid shape in another one made of different size stones, my first idea was using shatter it tool for doing it, uniform shatter style of PDI worked well however I wanted the fragments on the hands and feet of the golem to look like fingers and this wasn’t possible using Shatter it, besides I liked the Golem to be hollow inside to enhance the feeling of weakness when it breaks, so I figured out a different way. I took the bigger fragments generated by Shatter it on the surface for only one side of the character, making them thinner and flat, modifying its shape when necessary. That was a patience job but I got a good cover of large flat stones.

Mirroring this side of the character I got the whole model covered by stones nicely, I had just to fix a few stones on the middle for not interpenetrating each other. There were still a few little holes over the surface, to fix it I generated some particles over the holes and instanced them as geometry to cover these little areas.
After unwrapping the model I exported it to Zbrush for adding surface detail and texturing it, I used the great Polypaint tool of Zbrush for texturing it.Once again in Max, I built the rigging to can animate the Golem, I did a simple system of bones with IK Handlers, grouping the stones and linking the groups to the nearest bones.

Breaking the Golem in Dynamics
At this point I had a character made of 400 pieces, rigged and animated and I wanted the arms to break when hitting the rock in the middle. First thing I did was reshattering the pieces on the arms in about 5 shards each one to get more fragments when breaking it. I set the rock as a static convex PDi rigid body, the ground as PDi static mesh and selecting all fragments of the character I created a fracture body for it.
When simulating the scene, computation was very slow, checking the scene I discovered my ground was a high tessellate plane made of about 500000 faces! I applied a multires modifier to it cutting down the faces count to just 5000 while topology was preserved pretty well. After Updating the new ground object in PDi the simulation was much faster, however the arm of the character did strange motions when breaking and the whole character started to collapse too soon.

I decided to set up the simulation again with only the right arm of the golem in dynamics and of course the rock, after some testing I discovered that the problem was the arm motion was too fast for computing dynamics correctly, so I simply rescaled the time for making the animation 10 times slower, and this time it worked perfectly so adding the ground to Pdi and computing again I got the right arm breaking nicely.

I followed the same strategy for breaking the other arm and the chest, that is, I deleted all current Pdi bodies, setting the left arm in dynamics and simulating it along with the rock and the ground, doing in the same way for the chest of the golem after that. To take in account the flying fragments could eventually collide with those already on the ground, I set those fragments as kinematic Pdi bodies aswell.

When all the destruction job was done, I simply rescaled the time again to be 10 times faster for coming back to my original timing. But after doing it some fragments were trembling strangely over the ground so I had to cut off its motion by hand deleting its keys after the frame I wanted them to keep still. Finally I wanted the head of the Golem to bounce and roll towards the camera after breaking, for this I removed the parenting of the head and set it as a pdi body of type capsule, it was easy to make it rolling by assigning it a suited initial velocity.

Conclusions
I know breaking an animated character in dynamics is a difficult task with any tool. Pdi behaved well for shattering and dynamics, Im happy with the final result , however the setup of the scene was plenty of issues, like having to perform the simulation in 3 diferent steps. Pulldownit is an excellent plugin I wish it improves in the future to break animated characters more easily.
Author: Andres de Mingo
RenderOut issue #18 includes Battle London Case Study translated to Spanish, this amazing shot by Igor Gozalez won the last VFX learning internet contest,
Pulldownit plugin was used extensively int he making of the shot along with Maya fluids, worth to read the full article!

3DArtist issue #72 includes a review of Pulldownit plugin by Aldo Vicente, he makes several tests and the final score is 9/10, thats great, althought anyone using Pulldownit knows it is an excellent tool:)
The Magazine is plenty of other interesting articles and tutorials, dont miss it!

Julien Chiari tell us his experience using Pulldownit and Phoenix plugins in 3dMax for his destruction tests inspired by Minas Tirith. It is a good idea to make some tests before going to something bigger and with Pulldownit you can do your previz destruction fast and easy as Julien explains below.
When seeing “The Return of the King” by the great Peter Jackson, the destruction scenes of Minas Tirith environment impressed me a lot, so a little later I decided to create a destruction scene in the same spirit, and at the same time testing Pulldownit plugin in 3d Max which looked like the perfect tool to do it.
Modelling & Texturing
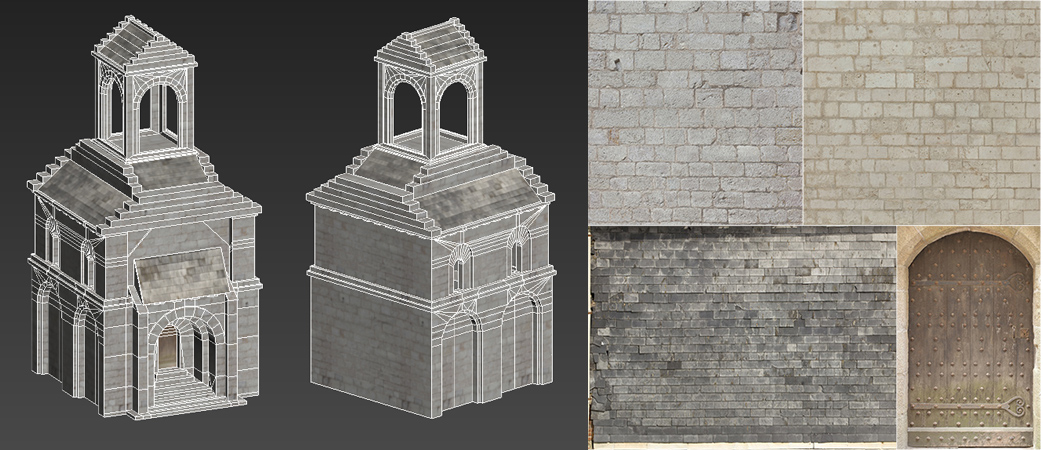
Using screen captures of the movie as references, for creating the building I started from a box primitive converting it to a polyobject and building the shape step by step using poly modifiers; given that the model was going to break, I was especially careful with topology, not open edges and such, and also keep poly count low for faster computations, at the end the model was about 2500 faces, I created shaders and VRay materials from HD textures found on the site cgtextures.com, great site to find textures by the way.
Shattering the geometry
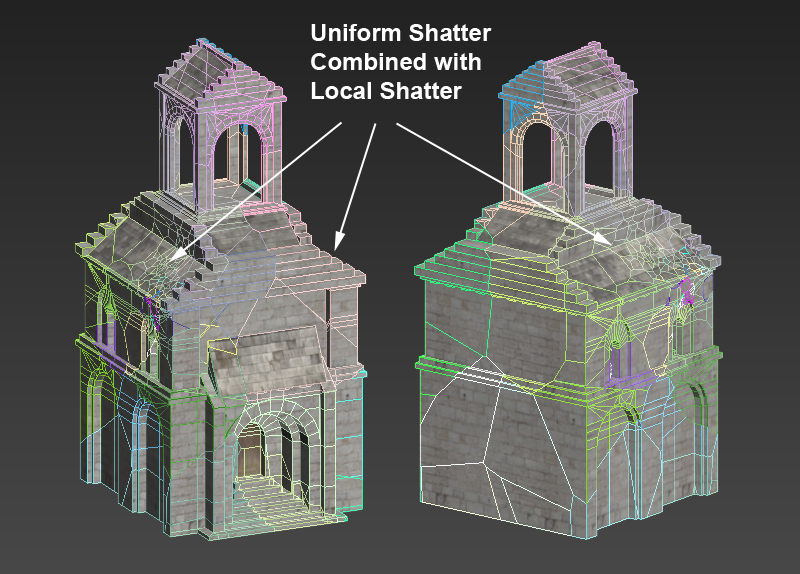
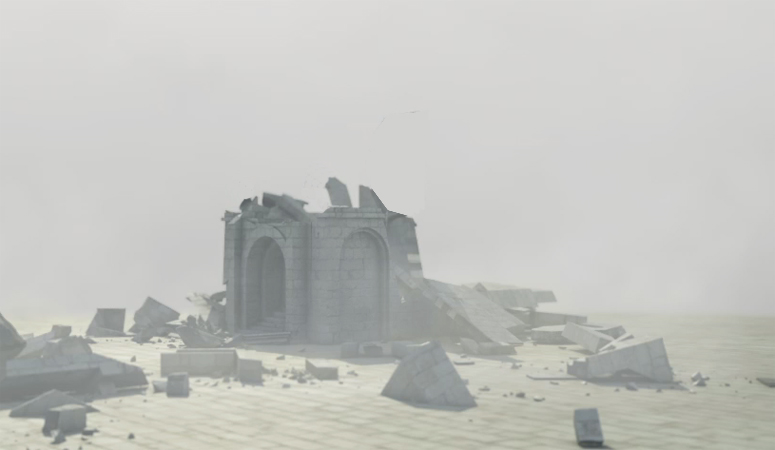
I started applying an uniform shatter to the whole building, PDI did it perfectly at once, even the tower and the complex geometry in the main door were shattered correctly and almost instant, pretty impressing. After that I added more fragments in the area of impact with the impact stone using local shatter, after a few seconds PDi had generated about 560 nice fragments from the original solid model.
Just after that I added PDI Jagginess to the fragments with a resolution of 2 to keep the poly count as low as possible but still increasing the realism of the fragments, this is one of my favorites features of PDI.
Computing Dynamics
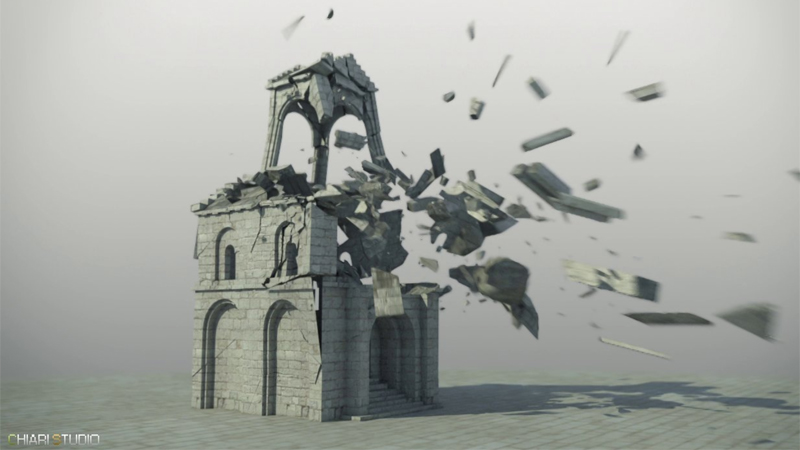
I created a PDI dynamic body for the impact stone, to make It move fast I simply added a large initial velocity and spin in PDi dynamics properties. Besides I created a fracture body for the whole building. I set quality medium for the tests as it was still pretty fast computing, using a core i7 with 16GB RAM, it took about 4 min to compute 250 frames of simulation, this nice speed allowed me to perform several tests with different parameters until achieving the desired look with ease.
Adding smoke
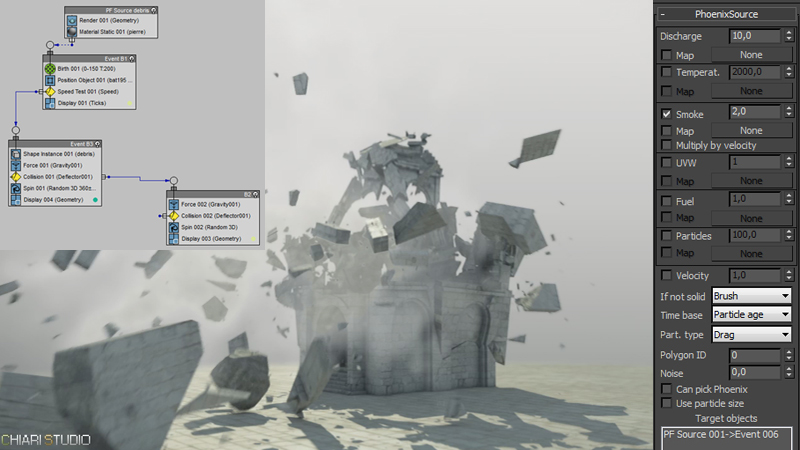
In order to add smoke to the destruction scene I have used the plugin PhoenixFD. For doing it I used a Pflow chart to emit particles from the fragments only when they reach a certain speed, for getting this the event 6 of the PF source was used as target for a PHXSource node.
Conclusions
In my experience Pulldownit is a powerful and easy to use plugin and very stable. The set of parameters allows getting fine control over the simulation, moreover it is fast computing. I will continue using it in my projects as after the tests, I have been definitively seduced by its stability, speed, simplicity and the quality of dynamics I`ve got.
About the author
Hi everyone my name is Julien Chiari, Im a 3D generalist currently living in south of France. I have got my degree at SupInfoCom Valenciennes, after that I have been working in videogames like Vrally, Roland Garros 98 or Test Drive Unlimited, since year 2000 I work as freelance in different projects. My web sites:
Pulldownit updates to v 3.1 fixing several issues of release 3.0, this update is available in the costumers area, after download it you have to replace the current plugin for the new one.
FIXES for Maya plugin:
FIXES for 3d Max plugin:
3DWorld Magazine issue #184 is about CG destruction, Carlos Pegar, the main developer of Pulldownit plugin, shares a quick tutorial about breaking wood splinters using it.
There are also an introduction to bigfrost in Maya and many other interesting articles about Cg destruction in this issue , dont miss it!

Countdown to CgAwards 2014 nominations by 3D World , vote your favorite tool to be awarded, do you like Pulldownit? vote for it in the plug-ins category
https://thecgawards.com/vote/plug-in/

Pulldownit 3 has been released with new features for Cg destruction, demo videos here:
For 3D MAX:
For Maya:
And an awesome shot by Ivan de Frias using Pulldownit 3
This is the brief list of new features:
Shattering of objects is now 20% faster.
New Preview Mode for Shattering: Allowing user to visualize all shatter params before breaking the geometry.
Conform Voronoi Reshatering: User is not longer constrained when reshattering a model, any shatter pattern can be added to the current set of fragments seamlessly, in addition new Conform Voronoi reshatering reduce the number of straight edges in the shatter pattern, hence improving the quality of the fragments generated.
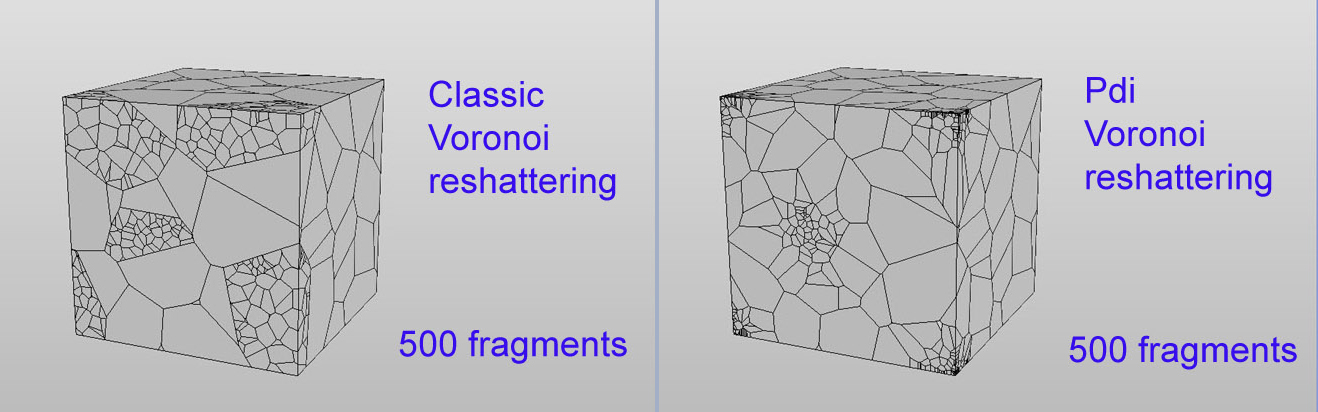
New Width parameter for Radial Shatter: adjust the size of radial pattern visually
New Undo Last button for undoing only the last shatter operation.
New Crackers Window: New window for controlling dynamic cracks, you count with several parameters for adjusting the cracks generation.
New Clusters Panel: User now can set clusters of fragment with different fracture parameters in the same fracture body, clusters can be edited at any time and are saved with the scene.
Bounded Force fields can break fracture bodies: Any bounded force field can break fracture bodies in an accurrate way.
Speed up auto body creation: Creating many rigid bodies at once from complex geometry is much faster now.
Maya viewport 2.0 supported in Maya 2015: Vieport 2.0 is supported in Maya 2015, however the performance of the tool is still faster using legacy viewport.
Also Several bugs has been fixed since the previous version: see the list of bugs fixed in the product log pages.

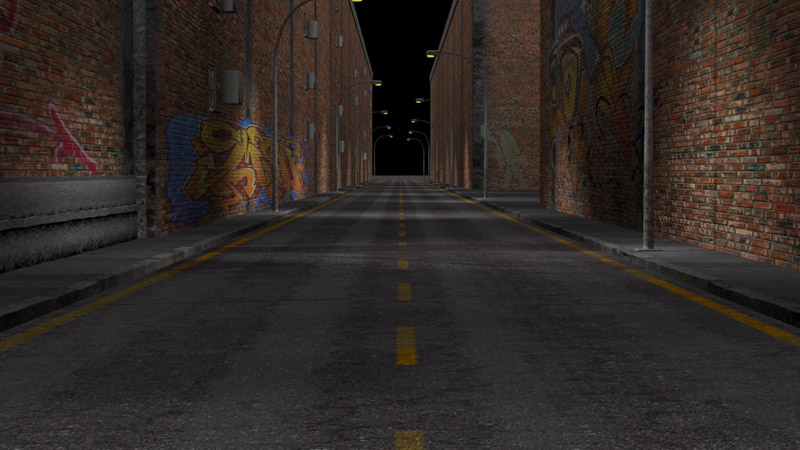
In this article Ivan explains some highlights about the making of this awesome destruction shot using Pulldownit 3 in Max.
Modeling
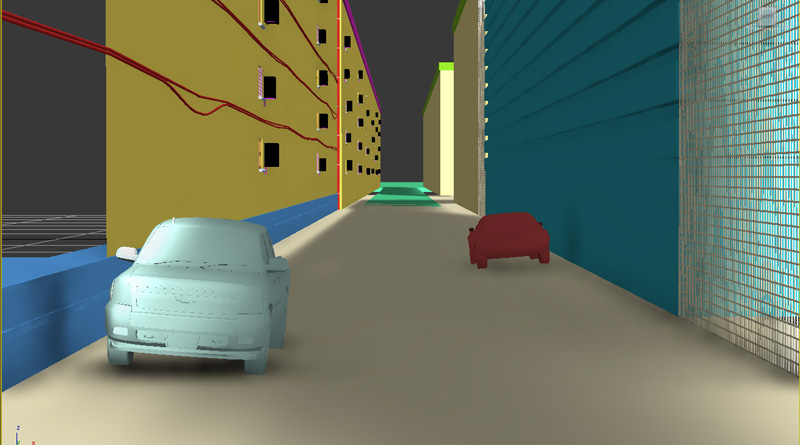
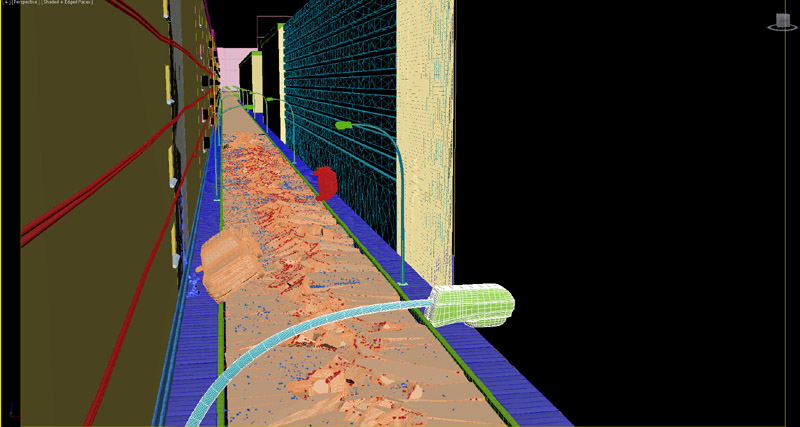
All modeling was done in 3d Max, taking care that models which were going to be fractured were independent and completely closed. The road was sculpted from a polygonal box for generating fragments of the desired thickness.
The buildings have been done from patches, and adding detail with edit poly.
Texturing:
The shaders in this scene are mostly procedural and counts with several maps.
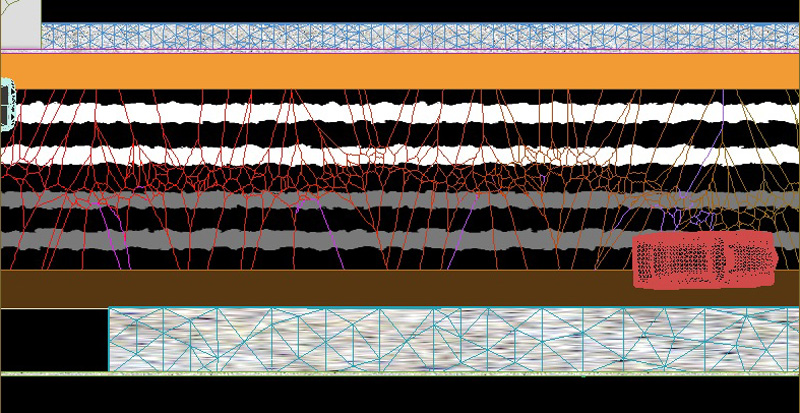
The road has a composite material of 10 levels, the base material is a picture of asphalt and adding other maps for displacement, oil slicks, cracks, holes..and so on to make it as realistic as possible. The border lines are added in a procedural way acquiring the texture and shape of the asphalt.
For the road fragments I have created a mask with 2 shaders, one of asphalt and another of soil just below the road.
The walls of the buildings counts with a base shader of tiled bricks and adding dirt and concrete layers, several graffiti bitmaps are added aswell.
Shattering with Pulldownit
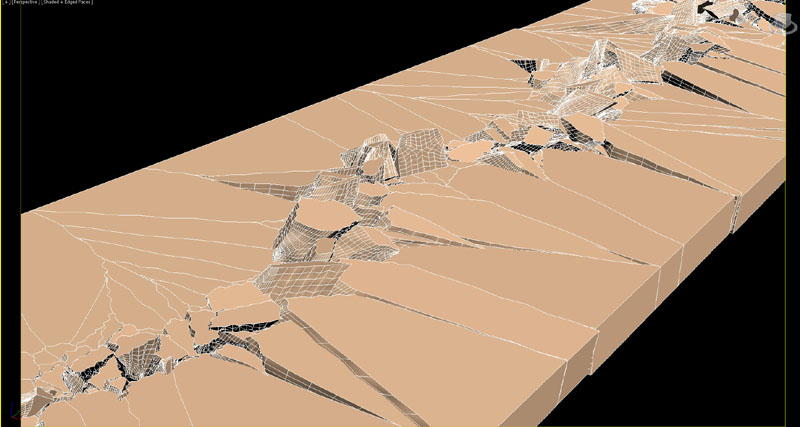
I wanted the crack starting in the middle and my road model was very long, in my first attempt with Shatter it, it was possible to be done, however the fracture body created after that included also the long part of the road which doesn’t break so I decided to split the road first with an slice plane to get this long fragment out of the simulation. So I drew my path over the other part of the road starting from behind it, I did it with a little zigzag for making it more realistic. Then I set path-based shatter and break the model in about 2000 fragments. New Shatterit preview mode was very useful for setting with more ease the extent of the fragments along the path.
Dynamics with Pulldownit
I continued by creating a fracture body for the fragments, and set fracture parameters for cracking surfaces as I had been told, 0% clusterize, static and activation as breaks upon impact and local propagation scheme. After that I created a Pdi Cracker selecting my path as source, when computing the road was breaking but fragments where falling to the void in the middle, I realized that I had to include another large thin box as static object just below the road for preventing this from happening. The new crackers panle was very handy for adjusting the crack effect, I set the impulse direction upwards because it looked nicer to me, and also increasing randomize to the maximum value. The cracking was indeed cool but most of the fragments came to rest without any slope, I wanted them to remain with some slope after cracking, it was easy to achieve adding a wedge object below the road model and setting it as static objet, in this way fragments leaned over it and I had only to hide the wedge in render. After the simulation was done I added more detail to the fragments with the amazing jagginess tool of Pdi and it looked much more realistic.
Adding dust & debris
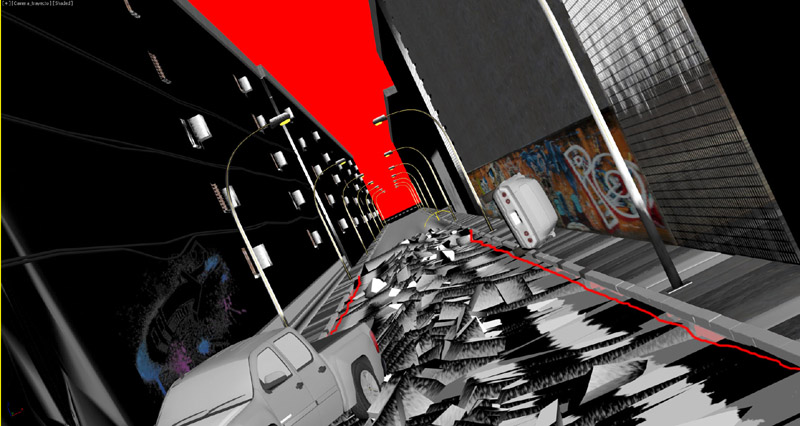
After the Pdi simulation was done I added more debris using Particle Flow, I created a Pflow source emitting particles from the fragments on the middle of the crack, about 200, making the particles inherit the speed of the fragments at 40% and adding a deflector to make them collide with the road.
In addition I created another Pf source of many tiny particles moving very fast, rendering them with Motion Blur Ive got the feeling of dust being emmited from the crack.
Lighting and Render
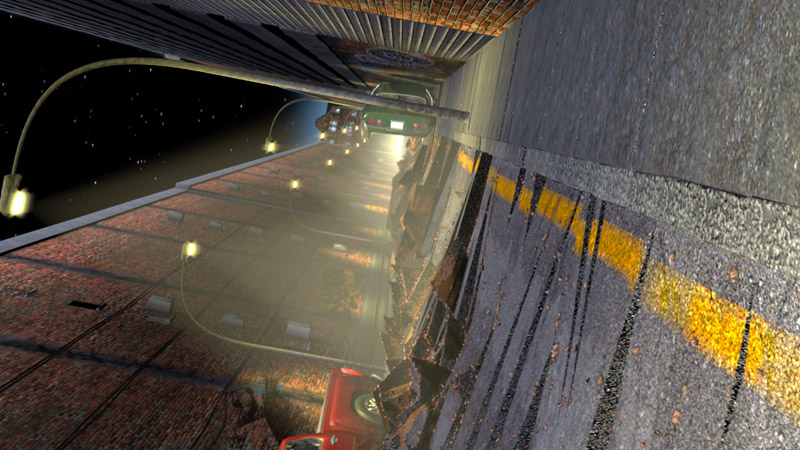
The camera trajectory has been animated adding a noise constraint to mimic the natural shake of a camera being hand-held inside a vehicle.
This is a night scene so pretty dark, there is a base ambient light and direct lights coming from the streetlights, a few extra point-lights has been added behind the buildings to enhance the illumination of some areas, all lights in scene counts with volumetric masks.
25 diferent render passes where needed using mental ray
Author: Ivan de Frias
http://vimeo.com/pytonproducciones

