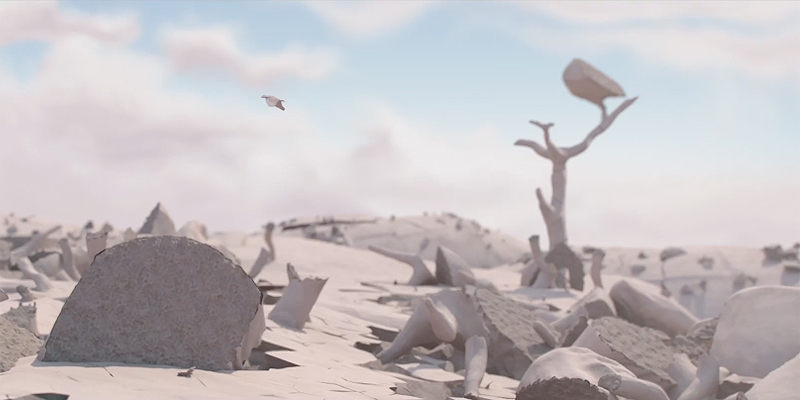
Robot escape from the Port by Andres de Mingo

Andres de Mingo kindly explains us the making of some complex effects using Pulldownit and FumeFX in 3dMax for his appealing destruction shot.

This project was about destroying a brick wall with an animated robot, I had done similar things in the past using Pulldownit and not difficult but this time I needed to create a thin long crack in the stucco before making the wall to collapse and in addition this crack should follow the trajectory of an animated  laser beam coming from the hand of the robot, that was the main challenge.
laserstart

Making the laser beam crack

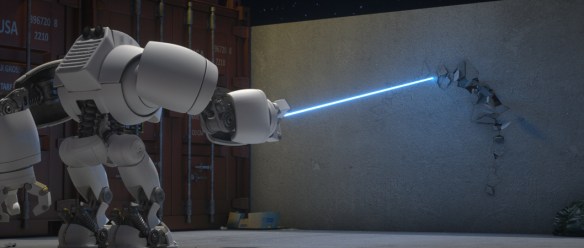
The laser is a simple thin cylinder in 3ds Max with the height value animated to make it grow towards the wall, besides the cylinder has a Octane material  with emission per blue color, in this way it can illuminate the scene and finally to make it shine I added glare and bloom to the cylinder as a post process with Octane render itself.

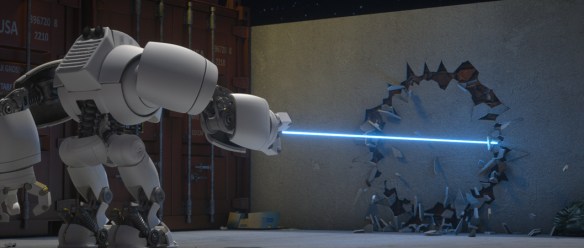
To fracture the wall in the shape of a circle I created a circle spline in 3ds Max and put it inside the stucco, then I used the path-based shatter feature of Pulldownit to create the fragments, with around 200 shards, but I wanted the center part of the wall to break later so I added a second local shatter pattern in the middle of about 70 shards.
laserend

For making the crack following the trajectory of the light beam, I used a PDI cracker object attached to the circle path, then adding some keys to make sure the cracker had the same speed of the laser and by playing the simulation I got this appealing effect done in seconds.

Only problem was the center part of the stucco was falling to the ground after it became isolated, to solve it I attached the stucco wall to the bricks behind by selecting the option “Attach Nearest” of PDI Fracture Bodies.
httingthewallhead

Hitting the wall

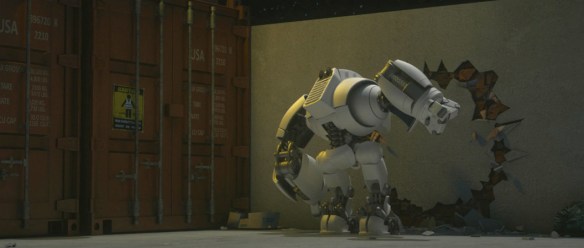
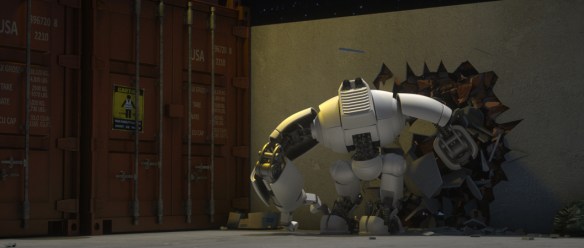
The brick wall is made of small cubes attached together as a single object, I discovered this is important to get it broken in the shape of bricks in dynamics, otherwise the wall breaks as a continuous surface. I used a similar setup than the stucco, this time I created two concentric circle splines in both sides of the wall of same size, and shattered the wall in around 1200 shards with path-based pattern, then adding a local shatter pattern of around 600 shards in the middle, in this way PDI created small fragments in the contour of the circles perfect to crack them. Also to get the bricks as separated objects after shattering the wall I had to check the PDI shatter option “detect mesh-groups”.
httingthewall2

After getting the fragments created I made a fracture body for the whole thing including the stucco part and set it as static in PDI fractures options, also setting Clusterize to 0 to force the wall breaking only along the circle shapes.

I didn’t use the robot itself for this part of the shot, in its place I created a flat cylinder of the same size of the circle and animate it to hit the wall, so it pushed only  the fragments in the middle and hiding this object from rendering made the trick.

I rendered everything with Octane, because it is very fast and easy to use, maybe you have more features with other renderers but they takes much longer to get the final images ready.
addingdust1

Adding dust

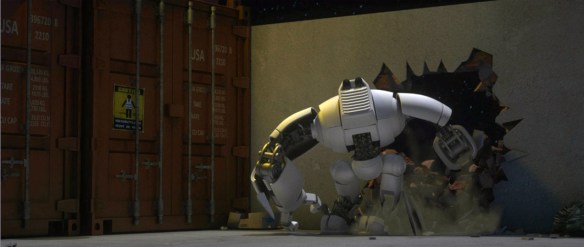
After the PDi simulation was baked I started adding dust with Fume FX, I generated a slight wake of dust following the laser beam by simply emitting smoke from the same cracker object I’ve used before, as this object was already attached to the circle path that was easy.

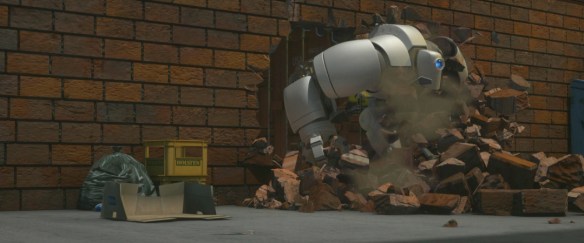
For adding smoke to the wall when collapsing, I used Particle Flow in 3ds max to attach particles to the stucco fragments but only along the borders, I set around 1500 particles for this, then I set those particles as source in Fume.

Dust is heavier than the air so it must fall eventually to the ground, I played with gravity and buoyancy values until getting the desired look for smoke.
addingdust2

For rendering dust, I used Arnold because FumeFx  doesn’t support Octane, however at first I wasnt able to render fume with Arnold neither,  finally I had to convert the smoke to openVDB format and use an aiVolume with aiStandardVolume shaders with it, after that everything was pretty automatic except I had to set some parts of the robot that were in front of the smoke as matte shadow objects to render it correctly.

Dust was rendered in a separate pass and composed later in Fusion in this way it gives you a second chance to modify color and brightness to improve the look of the smoke.

Conclusions
conclusions

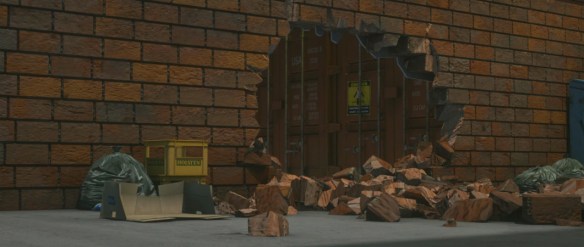
It was a nice experience working with Pulldownit plugin, in this shot there were different stages for destruction, first the stucco crack, then the hole in the middle and finally the robot passing through the wall, maybe the most surprising to me was PDI can make all of this effects using the same set in one run, without having to resort to more complex setup like preparing and hiding partially destroyed models and replace them at some moment. PDi was pretty reactive allowing me to get the results in seconds, modify parameters and compute again, that was great.

Adding dust to fragments with pFlow and Fume FX was also quite easy and fast computing.

Thank you Andres for sharing your experience in our blog!


War Reign Cinematics by Lee Soo In

Lee Soo In, FX artist at  Penxel, has uploaded several great cinematics and breakdown for the game War Reign using extensively Pulldownit plugin for destruction effects.

Lee Soo some words about his experience with Pulldownit plugin:

I’ve been using a lot of fragments tools. Among all the advantages of the PDI plugin,
the credibility of the results is very high and during the simulations access to objects is very easy.

Since we’ve done a lot of work with PDI, we’ve been able to do it very
conveniently.

“Bake simulation” is a good feature. Because I can change the timing and
speed freely , many times It is convenient to perform detailed tasks with keyframe modifications.

below another great War Reign cinematics with some PDi destruction effects, and lots of smoke using Fume FX and Krakatoa,

Thank you for showing those great  videos  and your testimonial Lee.

car crash in the garage by Andres de Mingo

Andres de Mingo  the author of this powerful shot,  kindly explains us how he did the destruction effects using Pulldownit plugin in 3d Max.


Impact with the stacked boxes

impactwithBoxes

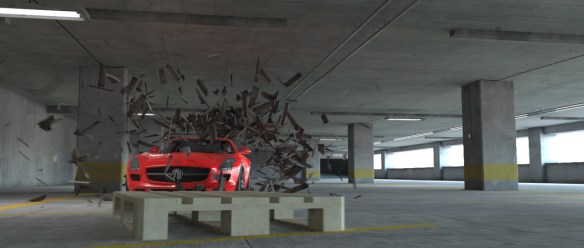
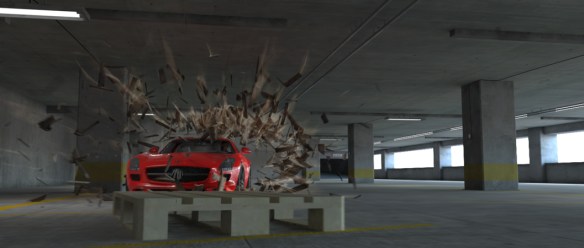
Mi idea was to break all the boxes violently when impacting with the car but leaving the pallet below it sliding fast forward as  a whole,   I believe pulling it forward the camera  makes the sequence more impressive for the viewer. For setting the scene with PDi first thing was to define the shape of the fragments the boxes will break in,  no doubt, PDI wood shatter style was the natural choice,  however applying it to the box as  a whole the fragments on the top and bottom parts shattered  in round fragments , the reason was the wood pattern was aligned with the sides planks, to solve the issue I detached top and bottom parts as different objects so I could apply the wood pattern aligned with them correctly. I shattered each box in around 150 shards doing it in this way.

I set the pallet as a dynamic object and the car as a kinematic one but with convex hull shape to speed up collisions. I created a fracture body for each box, setting activation as first hit, hardness 100 units and clusterize 0. Besides the floor and ceil and several pillars was set as static objects so fragments doesn’t pass through them. I hadn’t to do any further change and PDi computed dynamics blazing fast for the  near 800 objects involved  at once.

Collision with the pillars

impactwithPillar

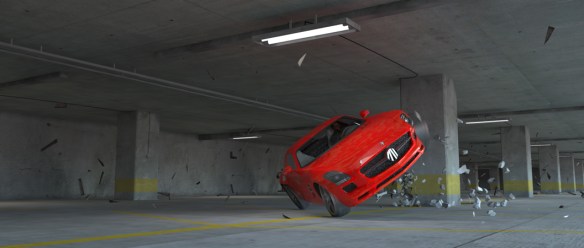
Shattering the pillars required   a little more care, I wanted them to stand but generating small fragments on the impact area with the car,  I wanted also small debris falling apart in the corners of the pillars with the ceil.  For the first one, which breaks in the background I simply combined two local shatter patters, one for the impact area and another one for shattering the top part of the object. For the other column which breaks  rather close to the camera I used  the new vertex color shatter which allowed me to make the areas of breaking more irregular and also generate easily random cracks over its surface when the car hits it.

I created a fracture body for each column, setting this time activation as breaks upon impact as I wanted the main part of the pillars  to stand,  as before the car was set as a kinematic object and the floor and ceil as static ones.  However in my  first attempt some big fragments broke off when impacting the car and I wanted them to stand, using PDI advanced fractures to set all big fragments as static objects fixed the issue, finally I did several test with different hardness values until achieving the desired  look for destruction.

Damaging the car

damagingthecar

The car itself should deform when colliding with the pillars and its bodywork get damaged with scratches and dust because of the impact, to deform the car I used a morpth modifier in 3D max, setting 3 states for the mesh with different levels of deformation.  The bodywork material is animated , by one side its glossiness cuts down progressively because of the dust adhered to it and for adding the scratches I used a composite material and animated  the opacity of each component shaders to  show the scratches after collision.

Hitting the ground

hittheground

When the car finally fall head down , there appears several fragments rolling over the ground, they are supposed to be debris from the ground and also small parts of the car itself. In place of shattering the ground and separating parts of the car I did a little trick, I created a thin box object over the ground textured like it and placed just where the car fall, a kind of step, I  shattered it in 200 fragments using uniform style, after that I changed the texture of some shards to be the same of the wind screen.  Then by setting a fracture body for this thin step when the car hitted it, the fragments rolled over the ground as I wanted.  I had just to hide this fake object until the car fall head down to get the effect done.

Adding smoke and dust

addingSmoke

Smoke was generated using Particle Flow in 3d Max and applying a smoke material for the particles, as not being a volumetric smoke like the one generated by a fluids plugin its behavior is limited and even poor in foreground. So I set its gain very low in Fusion to hide the defects as much as possible but still being able to see the smoke in the scenery.

Dust was added by rendering a very blurred pass of the fragments in motion and adjusting its levels in Fusion, in this way you get a pretty dusty look of the fragments.

thank you Andres, very nice work!


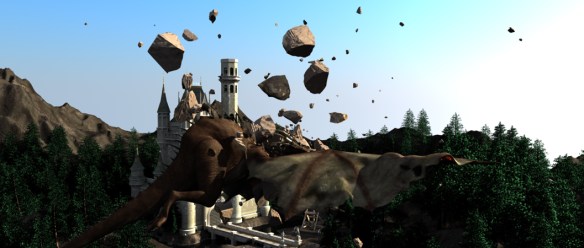
Dragon Flight towards the Castle by Andres de Mingo

Andres de Mingo give some insights into the making of  this nice video, specially he explain how  the castle was destroyed using Pulldownit plugin in 3d Max.

Modeling the Environment

environment

For modeling the terrain I started with a high tessellated plane, in order to create hills and valleys I used the soft selection tool to raise different areas, finally applying a noise modifier to get a rough look on the surface. The Lake is done with another large plane with an animated displacement, and of course a water-like blend material for rendering it translucent.  I populated the terrain with some trees,  I used a little MCG scheme to place the trees in groups and changing ramdomly its size and  number of branches so they didn’t look the same, MCG is a great tool for scattering objects ramdomly over a terrain.

Modeling the Dragon

dragonModelCompo

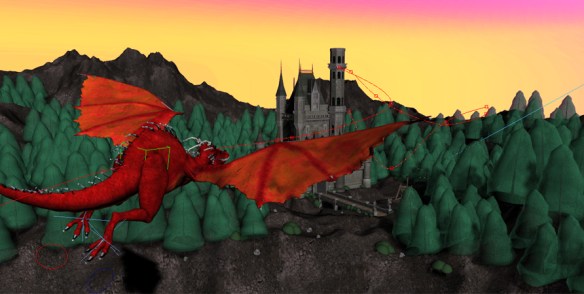
Strictly speaking I modeled a Wyvern, this is a kind of Dragon without arms,  it was modeled in several stages. First I did was  a raw low poly version of it using just edit poly and turbo smooth in 3D Max, once I was happy with the result, unwrapped it and sent it to ZBrush for modeling the HiRes shape, I did it in two separate layers, one for the dragon body and another for the independent parts:  claws, horns, teeth and thorns. I added also surface details to the body like wrinkles and scales, finally I applied a projection mapping to texture the model. I reduced the poly count of the model by passing some of the detail to a displacement map and send it back to 3d Max where I added a SSS shader to get a translucent look on the wings,  finally I  built a basic rig with bones so I could animate it later.

Animating the Dragon

dragonViewport

First I had to drive the overall trajectory of the dragon towards the castle, for this I used a dummy and linking the Dragon skeleton as child of it, then I did the dummy to approach the castle in a smooth way, from side to side, like the flight of a seagull. In order to refine the motion, I edited the dummy trajectory in Motion>Trajectories>Sub-Object>Keys, in this way I was able to handle it as a spline, displacing the keys in a smooth way. For beating the wings and leaning its body I did a classic “Pose to pose” animation while it was approaching the castle, finally to get a cloth-like feeling of the wings I added a Flex modifier in the rear part of them.

Impact with the Stone

impactWithStone

The stones thrown from the catapult are modeled as simple spheres with turbosmooth and a noise modifier to add roughness.  The stones were animated so two of them almost collide with the dragon body, and the last one impact its head.

Making the third stone breaking when colliding with the dragon was very easy using Pulldownit, Esteban Cuesta shows it in this great video tutorial,

When playing the simulation the stone got broken perfectly when colliding with  the dragon, finally I just added some jagginess to the fragments to improve the look of the flying fragments.

Destroying the Castle

Destroying the Castle

The castle model was purchased on Internet, it looked very nice but when shattering the tower with Pulldownit, I got strange artifacts on the arcs, checking the model I found that it had several open edges, adding a cap holes modifier fixed the issues but made it completely solid and I wanted the tower to be holed inside, so I had to edit the mesh and adding a cylindrical wall on the inside, then applying a cap holes I got the holed solid shape  that I wanted. I created a fracture body for the tower and set the dragon as kinematic with animated mesh to collide with it, in place of including the rest of the castle as static in dynamics I made some boxes and cylinders around it to act as barriers in dynamics to save computation time.

I destroyed also the roof of the tower below and the front porch, I did it in second step after baking keys for the fragments of the tower, I hadn’t any trouble to shatter those parts. For the few fragments falling into the pit in front of the Castle, I added a simple ripple effect to create some waves on the water  when the fragments touched the water plane.

castleEnd

This project was pretty complex for just one person, lots of modeling and animating the dragon took time aswell, but I enjoyed doing it, and Pulldownit plugin made the destruction work easy and funny.

Chang Metamorphosis by Artem Paramonov

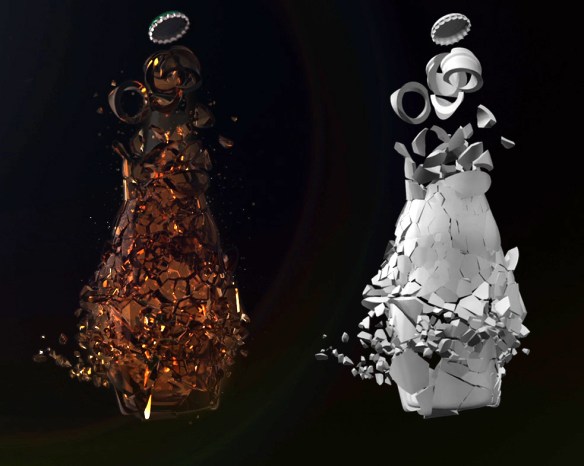
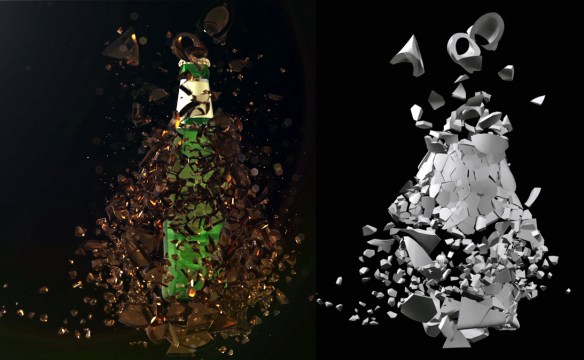
Artem Paramonov show us this great breakdown he made for a Chang beer commercial, Pulldownit was used for shattering the bottle,  Artem kindly explain several technical details below.


My name is Artem Paramonov, I’m senior 3D creative. This project was done for Iris Sydney, we’ve got a brief from the client to create a stunning animation of a bottle being shattered. The most difficult part of it was of course the simulation itself, and this is where PulldownIt did what it does best – simplified everything.

The tricky part was to make shattering simulation controllable, to start in specific areas and follow up with a general explosion. We also wanted to do it in a bullet time manner to make it look a bit more dramatic. So we, basically, had 2 waves of explosion – first to break apart everything and second to blow all pieces off the screen.

compo1

It was really great being able to define how bottle will be shattered, where the big chunks will form and where we will get the small pieces. Now, slowing down the existing animation and then speeding it up could be generally quite tricky, so once I was happy with simulation results I baked everything into a keyframes and after that into a geometry cache – this gave me a flexibility to re-time it the way I wanted to. Shockwave effects were created later on in After Effects with a standard effect called CC Ripple Pulse. After rendering primary simulation I also rendered a still 2k image, to use different pieces for 2D particles and “dust”. Finally assembling everything in After Effects.

compo2b

Overall experience with Pulldownit is just so sleek – that I was even a bit overwhelmed when I got my results that fast. I could play with it for weeks – it is very enjoyable to use it. It is stable, predictable and it just Works!

Breaking Letters Demos by Esteban Cuesta

These are the  breaking letters demos Esteban Cuesta made  as a final example of his tutorials on shattering text with Pulldownit plugin, you can find this tutorial a couple of articles below. Esteban Cuesta kindly explains some details about the making steps.


I wanted to make a video as a final demostration of my breaking letters tutorials with Pulldownit 3.7, I designed demo #1 as a classic letters intro, quick and lively, the motion of each word is animated until it touch the word below, then I activate the fracture bodies so pieces of letters start to crumble and fall, I used a Wind field to stress the debris falling effect. The final destruction was as easy as animating the word “Pulldownit” so it pass through the whole text and set it is a kinematic rigid body but I switched to “Convex hull” Bounding Volume to speed up the testing, the dynamics looked good anyway so I used it for the final shot too.

Doing the first shot wasn’t difficult at all and pretty funny, this encouraged me to make a longer one. This time a decided to add a plate showing the different shatter styles of Pulldownit with letters, all styles except “Wood splinters” as I think this style doesn’t make sense for letters.


All sets are done in the same way, using the 3D Max text tool to generate each word and making the endings fit each other simply by adjusting text size and kerning, and then collapsing all the words in a single poly object. At this point I applied the intended shatter style and create a fracture body for all pieces. For the Radial style plate I used an animated sphere to trigger the destruction, I simply hid it when rendering the scene, for the Path style I used the great crackers objects of Pulldownit as triggers, the rest of plates uses a Wind field to trigger the destruction, animating its Strength in order to get a increasing amount of falling debris.

Rendering was done using Mental ray in 3D Max, applying a high reflectance material to the letters and a less polished glossy material with the same colour to the inner faces after breaking.

Pulldownit worked very well , I haven’t any issue aside tweaking the parameters to get the dynamic behavior I wanted, It was very intuitive and fast computing using it.

Quake at St.Lawrence Church By Luis Tejeda

Luis Tejeda has posted a new video showing a cinematic action shot where a church tower collapses during an earthquake. The scene is a recreation of the real environment and setting of the San Lorenzo Church in Cordoba, Spain. Pulldownit 3.5 was used for all destruction effects.

See breakdown in the project page,

http://www.luistejedastudio.com/news

The Midas Effect by Niels Bosch

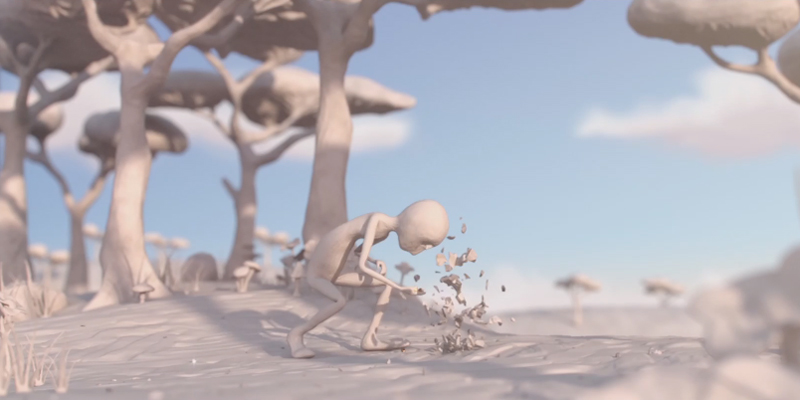
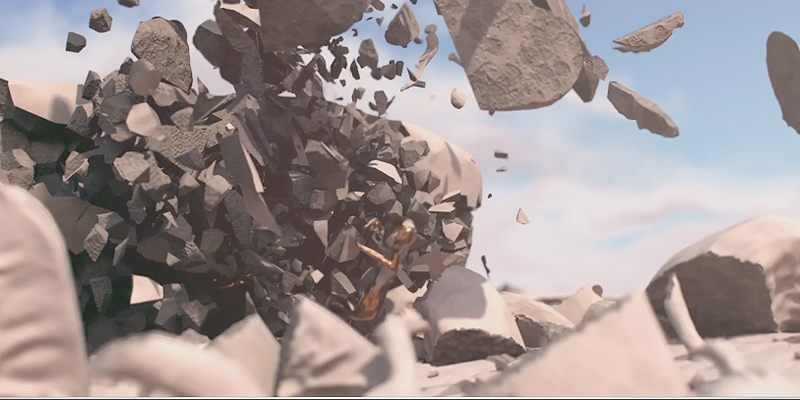
                                                                                                                                               Niels Bosch kindly explain us the main features of this endearing story made for his final project at Utrecht School of Arts, Pulldownit plugin was used extensively for all the scenery destruction effects.

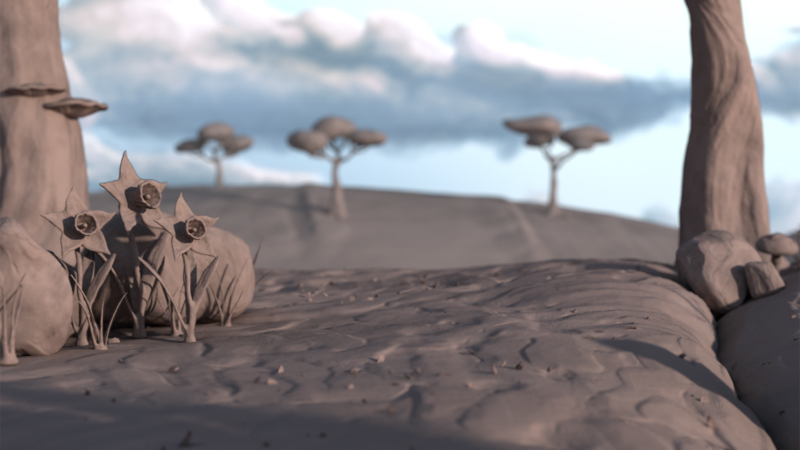
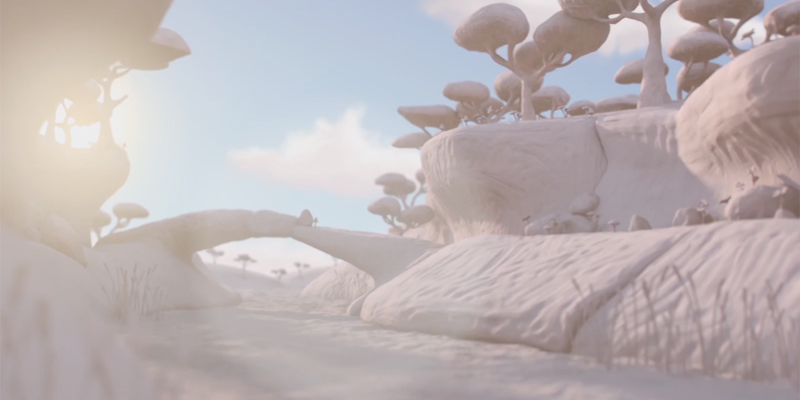
The main goal for the look of the film was to make a believable feel of the clay material, everything had to look hand sculpted. In order to achieve that goal we turned to Zbrush for the sculpting part. For the clay structure we mostly used the standard brushes within Zbrush. These basic tools gave us such great freedom to make everything look as if it was hand sculpted.

The simulations were all done with Pulldownit. We wanted to create a “cute” explosion, it had to feel tiny, like it all happened inside of a cardboard box. In order to do this we didn’t use any dynamic fields to make the pieces fly apart, instead we gave every piece a slight angular acceleration to give it a springy effect. We used particles to simulate smaller pieces, the emitter was connected to the inner material of the shattered pieces. These particles were driven by several expressions which influenced its motion parameters like angular velocity, to give them a dynamic feel.

What I liked most about Pulldownit was the straight-forward usability, everything
from shattering the object to baking the simulation was very clear and easy to use.
The dynamics properties were easy and fast compared to other dynamic engines, and
the different bounding volumes came in very handy while doing larger simulations.

The main render engine we used was V-ray. The three of us had worked with V-ray on several projects so it was our first choice. The shading of the clay world was just a simple V-ray shader, nothing too fancy because the clay look was achieved by sculpting and then applying the displacement maps on the low poly mesh. We knew the render times would be substantial because we used a lot of displacement maps. So in order to lower the render times we decided to use no reflection on our clay shader and we used the world position pass and the normal pass to do some relighting in Nuke in order to fake the reflection.

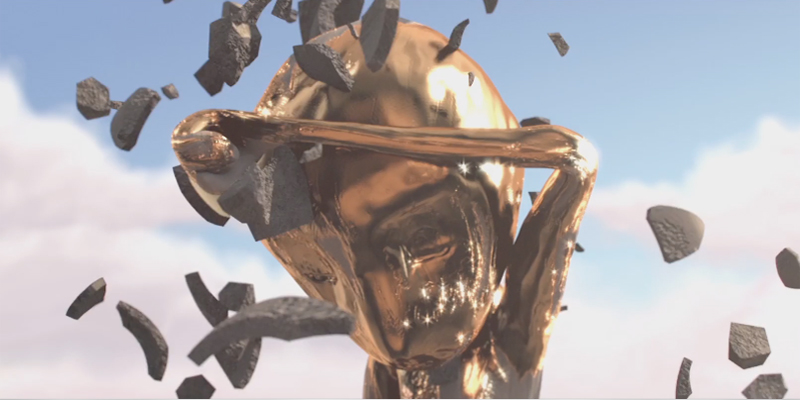
The shading of the character was a bit more advanced. It contains the clay shader but on top of that the facial expressions and the gold parts were done with displacement maps and animated masks which connect to the controls of set driven keys. The disadvantage for using displacement maps for facial expressions is that the animator cannot see his actions in the viewport, so animating would be a pretty clumsy and very time consuming task.

To avoid this we came up with a solution to use the switch material within V-ray. This allowed us to make a preview material for the animator to see his actions, and switch between different clay/gold shaders for final rendering all connected with set driven keys to the face GUI.

About the authors:

Niels Bosh

https://vimeo.com/nielsbosch

Jonathan Krijgsman

https://vimeo.com/jonathankrijgsman

Almar Sloot

https://vimeo.com/almarsloot

UFO attacks “Puerta de Alcalá” by Roberto Martin

dont worry Madrileños, Puerta de Alcala is still there:), Roberto kindly explains how he did this shot using Pulldownit plugin and Maya fluids.

Why did you decide to make an UFO attacking in Madrid?

Some time ago I did a previous test with Pulldownit and Maya fluids, just to try this plugin, to my surprise it wasn’t difficult to make my model blow apart very nicely, that encouraged me to make a complete shot in a more realistic way in my spare time. I currently live in Madrid, so I decided to make an UFO attacking the “Puerta de Alcala” because it is an emblematic monument in this city, like blockbuster movies in which UFOS always destroy monuments.

How did you model the “Puerta de Alcalá”?

I built a new model of the “Puerta de Alcala” trying to make it as realistic as possible, for this I went to the place for several weekends and I took lots of pictures of the monument, I used a front picture of the building as an image plane to build the overall proportions of the structure, from there I started adding details little by little. I modeled the main structure as a single shape, but for statues and other ornaments I did them apart not to complicate the base model too much and besides, it allows me to handle shapes independently if needed , always making sure there weren’t holes in the models or duplicated edges as Pulldownit needs this to shatter objects correctly.

How did you model the environment, buildings and trees?

I took several pictures of the environment, specially the trees, I found out the exact type of tree in this area of Madrid and luckily find a similar model on the web, I had just to apply a photo shader for the trunks and replace the leaves for the correct ones. I modeled by myself other elements like the bus stop, the cigarette kiosk and the landmark with the city map because I wanted to approach the real environment as much as posible.

How did you model and animate the UF0?

Modelling the UFO wasn’t difficult but involved quite a lot of time because I wanted it to be different to any other UFO seen in films or games , in order to animate the rotations of the different rings, first I did was a little hierarchy of groups and then wrote an expression with randomness in the 3 axis to avoid too regular rotations of the rings.

How did you shatter the building?

It was very easy, just selecting the shapes and let Pulldownit shatter them, only I had to shatter the main building and the ornaments in different stages to get the look I wanted for each kind of shape. I did several shatter tests before getting the look I wanted so I had also to clean the scene for unused geometry before moving to dynamics.How did you simulate the destruction of the building with Pulldownit?

I created fracture bodies for every group of fragments and started simulating everything together but the result was too chaotic, there were thousands pieces in motion which make difficult to handle them and drive the simulation so I decided to remove everything but the main structure to focus in the way it explodes and adding the destruction of the ornaments in a second stage. I used a volume axis field to make the main building exploding inside out. Once I was happy with its dynamics I cached it and start making the statues exploding aswell, as before I assigned a volume axis for each statue and animating the volume I make them exploding actually one second before the main building breaks apart, because I wanted the statues destruction being like the prelude of the big explosion.

How did you add smoke trails to flying fragments?

I did the smoke trails using Maya fluids, to emit from the internal faces only first I did was separating those faces from the rest, that wasn’t difficult as PDi applies a different material to these faces. Then I combined all those internal faces in one single shape, thanks to history the animation was preservedJ, after that I was able to emit particles from this single shape in the usual Maya way, and making a goal of value 1.0 to these particles, they remained stuck on the faces, by limiting the emission of particles to match the number of vertices of the shape I got one particle per vertex. After that I created a fluid container and set the particles to be the emitters of fluid; in this way I was able to add an expression to drive fluid emission based on particles velocity, sadly this expression prevented from cache the particles but the method was good enough to get it done.

How did you render smoke trails?

I used Maya software to render the fluids, it get along very well with fluids, for example it respects the fluid volume perfectly. I had to apply a surface black shader to every object in scene for not seeing them in the alpha channel and compose fluids render with the rest later in After Effects.

How did you added green lightnings from the UFO and image distortion?

I did green lightnings using a tool of After Effects, you have just to set the source of the ray and the target position, aside other parameters like its color. You have to animate the ray by hand , but once done, simply by cloning it and modifying the source and target you can get as many rays as you want in a blink. I applied also an effect of distortion when the building explodes to get the feeling of an expansive wave. For doing it I used a mix of 2 alpha masks with a distortion filter.

Conclusions about the most relevant matters of the shot

I think one important thing when destroying large models is the feeling of scale, so a monument doesn’t look like a kid’s toy when falling and breaking. Pulldownit makes very easy to change gravity and masses to get the correct feeling of scale. This plugin is very stable and easy to use, each new version improves in workflow and features that’s great, it is perfectly integrated with the Maya workflow, specially for particles and fluids. I like also the fast computation of fracture so you can make little changes and see the result quickly in the viewport.

thank you Roberto, looking forward to your next shot

https://vimeo.com/user5582471

PULLDOWNIT used in POLIS Teaser

James Little member of FX team of POLIS film has confirmed Pulldownit plugin was used for the destruction of the combat bot , POLIS teaser is a Vimeo “Staff Pick” and has won several awards,

James kindly explains several details about how this effect was done

Using PDI allowed me to quickly visualize the shot and iterate in a timely manner .  It’s speed and accuracy with collisions is a very powerful feature in pulldownit.

https://vimeo.com/127007943

I actually did the simulation in three stages to get the look and feel I
wanted.  I used PDI’s awesome rbd engine to sim the major armor panels on
the robot as straight rbd’s with no fracturing, as metal isn’t so brittle
that it would shatter at room temperature.
After I got a motion I liked I baked out the geo.  I then selected a bunch
of key pieces inside the droids innards that would create interesting and
unique silhouettes when they are ripped out of the body cavity and set them
up as rbd objects.
I then used the earlier baked sim to be passive colliders to drive the new
PDI sim.  I wanted a richer feel to the effect so you see shapes more like
nut’s bolts, and wires  coming from his insides.
After that step was done, I cached out that sim as well and used the
resulting cached geo as a passive collider yet again to actually fracture
random pieces inside so you get irregular shapes filling up the explosion
cavity and adding overall materia/mass to the effect.

This workflow is very friendly for getting the exact look you want, as you
can preserve the parts of the sim you like and then focus on a single
aspect of the effect at a time to get the desired end result.  It’s also
much easier to sim when only one layer is calculating at a time.

https://vimeo.com/127007944

After the PDI sims were done and cached, I emitted instanced nParticles to
make up the extremely fine particulate material that would not be suitable
for an rbd sim.  I then used the nParticles to emit Maya fluids to create
the dust cloud.

I really enjoyed doing this shot and using PDI really made the task much
easier and manageable.

The Full POLIS teaser

https://vimeo.com/95826676