NOTE: Users of Puldownit 5.x cloud floating licenses must install this update to can connect to the licenses server.
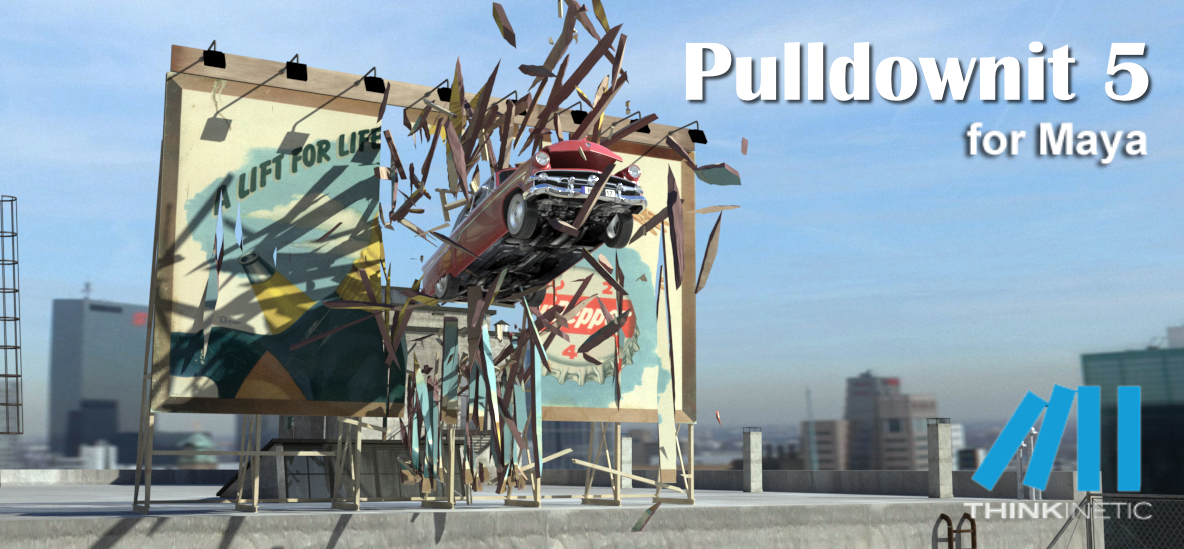
Pulldownit 5.7 is here! this new version introduces a new Fast Stacking & Deactivation solver which computes up to 4 times faster in massive destruction scenes, in addition instanced shapes are supported for dynamics and shattering so you can compute thousands of hi-poly objects in dynamics seamlessly and with much less memory overhead.
Animated characters now computes faster when colliding and fracturing other objects, and a new Anim Speed Multiplier parameter allows to fine tune the strength of the impact between animated objects and dynamic ones, besides cracker multiplier can be animated allowing to decrease or disable the crack effect at any frame.
Regarding shattering, PDI Jagginess gets a new “Asymmetric tessellation” mode which generates nearly 50% fewer polygons with a similar look of rough faces than when using Uniform Tessellation.
There are also useful improvements to the UI, a new option to create several fractures at once and you can add jagginess to all PDI fragments in scene with one click. Hierarchies of rigid bodies can be auto created just by selecting its parent group, and there is a new option to set all dynamic values to default for selected rigid bodies.
Last but not least we have fixed quite a few annoying issues from previous version,you can review below all performance and usability improvements and you can check the whole list of fixes in the Pulldownit version logs page:
Read the full list of fixes in the Pulldownit web site version logs
Licensed users can already access Pulldownit 5.7 from his account and there is a demo version for Maya 2024 in the Thinkinetic web site.
Shatter New Features
Shatter it support instanced shapes, instanced shapes are supported and can be shattered and reshattered seamlessly.

New Jagginess mode “Asymmetric tessellation”, this new tessellation mode generates nearly 50% fewer polygons than the Uniform one with a similar appearance of rough faces.
Dynamics New Features
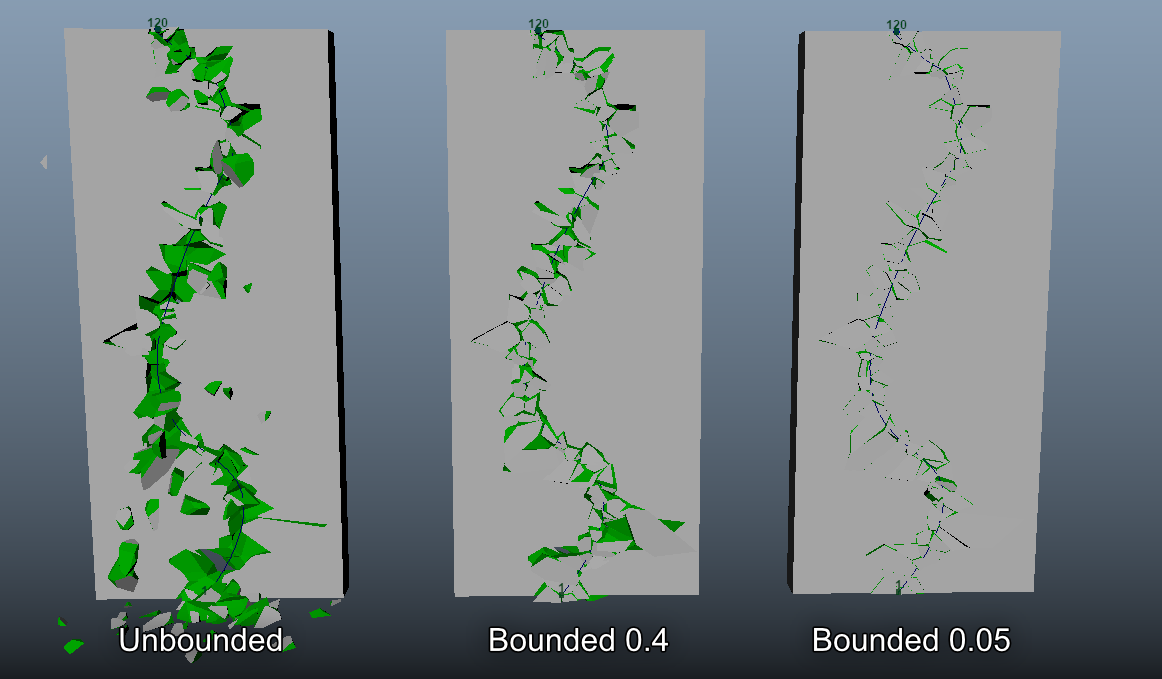
New Fast Stacking & Deactivation solver, scenes involving hundreds or thousands of fragments in dynamics now computes up to 4 times faster, besides this new solver highly reduces drift motion of fragments resting in the ground.
Instanced shapes supported as rigid bodies, PDI solver now supports instanced shapes in dynamics, allowing to compute massive simulation of thousands of objects with less memory overhead.
Improved performance in fracture against animated bodies, animated or deforming objects now computes faster when colliding and breaking other objects, besides user can easily control the strength of the impact with the new anim speed multiplier parameter.
UI Enhancements
New parameter Anim Speed Multiplier, allowing to easily control the strength of the impact between animated objects and dynamic ones.
New ability to animate cracker multiplier, user can now modify the strength of the crack effect during the simulation or disable it completely at desired frame.
New Fracture setup option “One per Shatter Group”, allowing to create several fracture bodies at once from the current selection of objects.
New option “Add Jagginess to All fragments”, allowing to add jagginess to all PDI fragments in scene with one click.
New “Fast Stacking” simulation option, user can revert to classic, more accurate, but slower stacking solver by disabling this option.
New ability to auto assign unique names to duplicated nodes, when selecting nodes to create rigid bodies from them PDI will rename any duplicated node automatically if authorized by user.
Animatable fracture parameters are auto displayed for current selected object.
New ability to create hierarchies of rigid bodies just selecting its parent group.
New UI option “set all dynamic values to default” for rigid bodies.